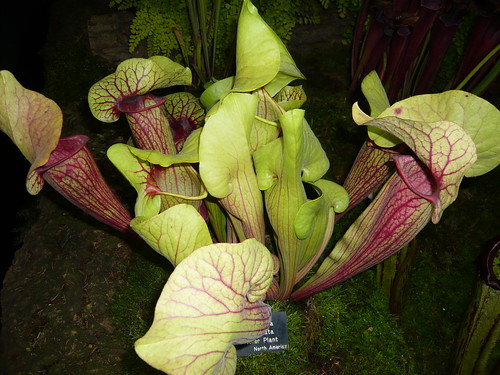
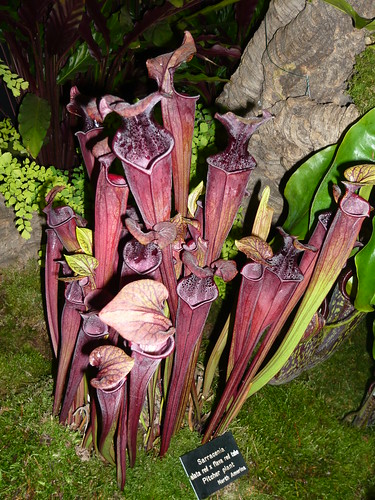
Sarracenia Trumpet and Pitcher Plants
Do you want to try growing plants that eat insects rather than suffer from the exact opposite? If so then the North American family of Sarracenia Trumpet and Pitcher plants may be just what you need.
The insect trap is a vertical tube with a ‘hood’ over the entrance with a lip that secretes insect attracting nectar and scents.
Selection of Carnivorous Pitcher Plants
Yellow Trumpet -Sarracenia flava
Hooded Pitcher Plant – Sarracenia minor
Sweet Trumpet – Sarracenia rubra
Purple Pitcher Plant – Sarracenia purpurea
Pale Trumpet – Sarracenia alata
Sarracenia exornata one of many hybrids
Growing Tips for Trumpet and Pitcher Plants
Sarracenia like to be much wetter than Venus fly traps. You can’t really over water pitcher plants.
The favoured growing system is in shallow water filled ‘trays’ see a decorative version below.
Rain water or deionized water is a better idea than tap water Depending what your tap water is like it could kill them off slowly.
Pitchers and Trumpets like to be stood in a couple of inches of water and this can help insects breed.
Substitute artificial light for sunlight that they would get in natural conditions. A minimum of 7 hours per day bright light is recommended by experts.
Sarracenia do not self pollinate so hand pollination is necessary when insects may get digested.
For the enthusiast the ‘Carnivorous Plant Society’ has a wealth of help and information on this link
Growing Carnivorous and Insectivorous Plants