Browsed by
Month: September 2012

Late Flowering Autumn Perennials

Late Flowering Autumn Perennials

Autumn perennials offer some really deep vivid colours. A final flurry before the end of the season.

Here in Oxford, there are some wonderful Autumn borders.

autumn flowers

Autumn border at Christ Church College, War memorial gardens, offers a stunning back drop for this rich autumn border.

autumn

Oxford Botanic Garden’s autumn border. (This border effortlessly moves from summer to Autumn)

Great Perennials to Try for summer Colour

  • Heleniums – Deep Red ruset, daisy like flowers. Easy to stake and grow. These flower from August to October.
  • Aster / Michaelmas Daisies. Very easy to grow. These may need staking, but many new varieties are medium height and self-supporting. They are fairly low maintenance, though tend to be afflicted by mildew towards the end of the season
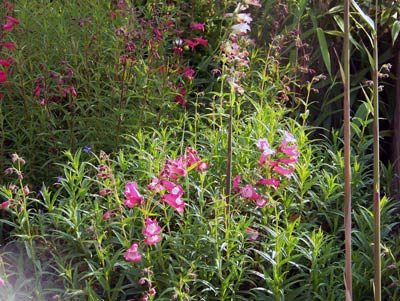
  • Penstemon. Another great perennial, which can flower from June, until the first frosts. Really the best value perennials in my garden.
  • penstemon


Autumn BOrder

Heliotropes and Asters offer a mixture of deep hues.

Autumn BOrder

Free flowing planting allows a riot of colour.
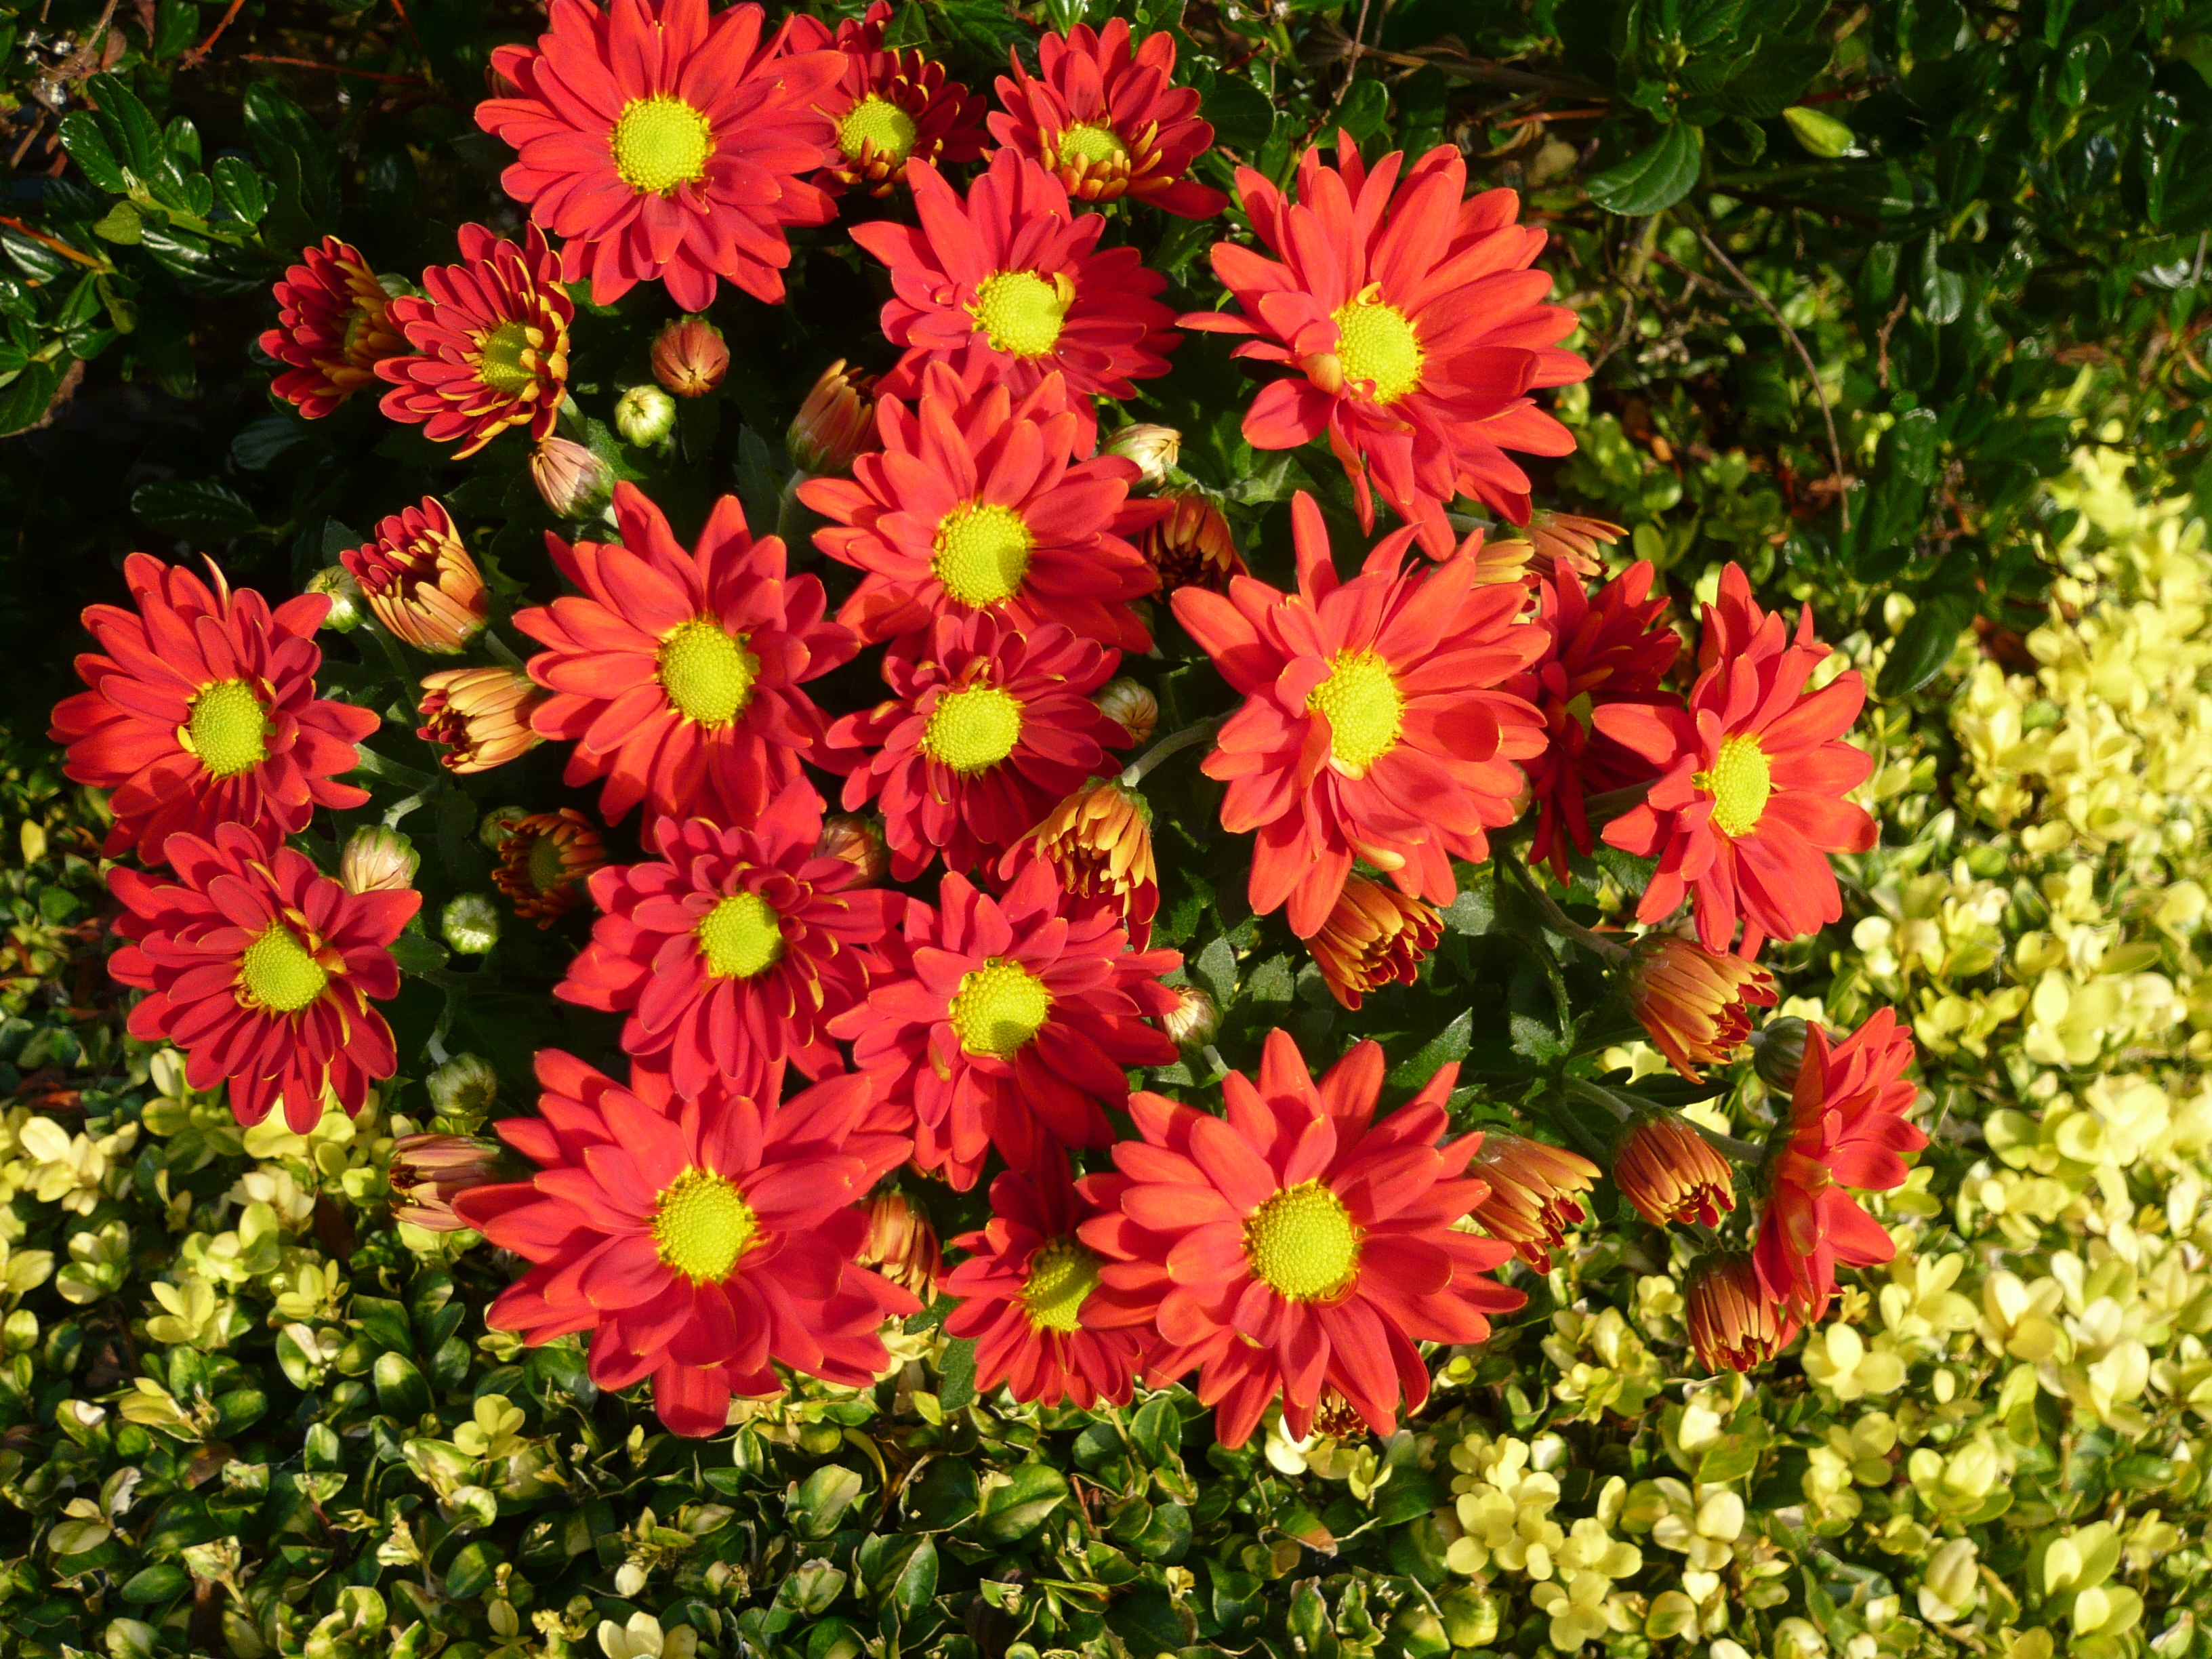
Oxford Botanic Gardens

Michaelmas Daisies

Autumn BOrder

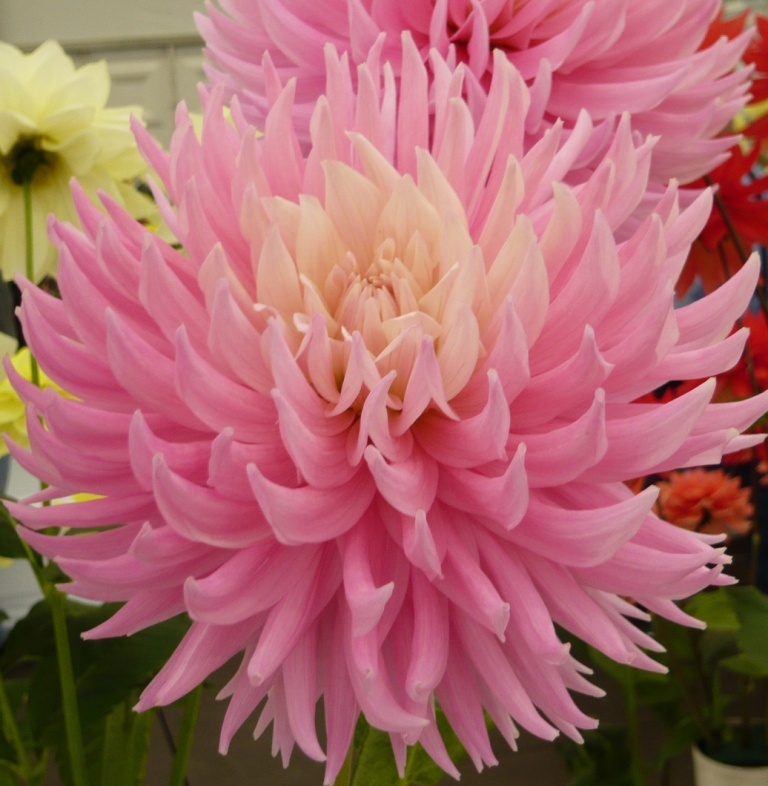
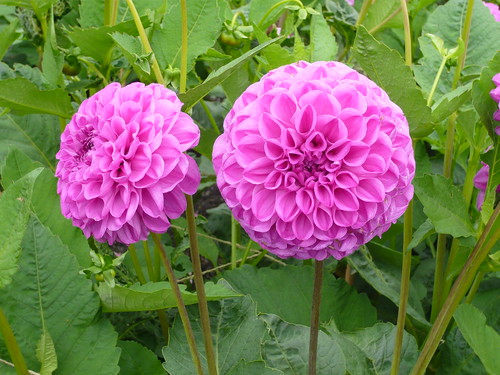
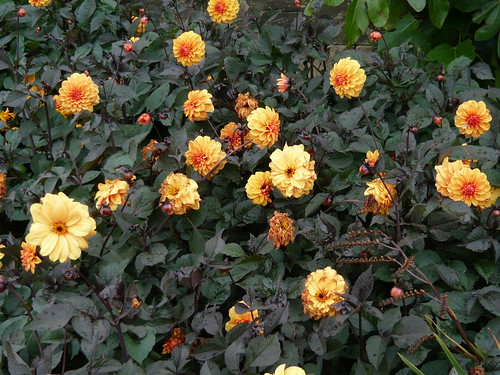
Lovely Red Dahlias, really stand out against the darker leaves. They remind us of the hot days of summer
autumn
A close up of the dahlias; these really are offering great value. They are an excellent plant for having such a long flowering season. Dahlias can overwinter in mild winters, if you give it a good mulch. However, for safety is better to lift in November and bring inside.

autumn

enjoying the flowers

Read More Read More

Sarracenia Trumpet and Pitcher Plants

Sarracenia Trumpet and Pitcher Plants

Do you want to try growing plants that eat insects rather than suffer from the exact opposite? If so then the North American family of Sarracenia Trumpet and Pitcher plants may be just what you need.
The insect trap is a vertical tube with a ‘hood’ over the entrance with a lip that secretes insect attracting nectar and scents.

Sarracenia exornata

Selection of Carnivorous Pitcher Plants

Yellow Trumpet -Sarracenia flava
Hooded Pitcher Plant – Sarracenia minor
Sweet Trumpet – Sarracenia rubra
Purple Pitcher Plant – Sarracenia purpurea
Pale Trumpet – Sarracenia alata
Sarracenia exornata one of many hybrids

Pitcher plant

Growing Tips for Trumpet and Pitcher Plants

Sarracenia like to be much wetter than Venus fly traps. You can’t really over water pitcher plants.
The favoured growing system is in shallow water filled ‘trays’ see a decorative version below.
Rain water or deionized water is a better idea than tap water Depending what your tap water is like it could kill them off slowly.
Pitchers and Trumpets like to be stood in a couple of inches of water and this can help insects breed.
Substitute artificial light for sunlight that they would get in natural conditions. A minimum of 7 hours per day bright light is recommended by experts.
Sarracenia do not self pollinate so hand pollination is necessary when insects may get digested.

For the enthusiast the ‘Carnivorous Plant Society’  has a wealth of help and information on  this link

Growing Carnivorous and Insectivorous Plants

Secateur and Secateurs Tips

Secateur and Secateurs Tips

anvil-secateurs-052

Americans may call them pruning shears or hand pruners but my short handled pruners are called secateurs. Secateurs are like special scissors for cutting stems and branches that are less than a finger thick. They have a form of spring to open them and a catch to lock them in place.

Tips for Secateurs

  • Buy a good pair (or one of each style see below) and look after them.
  • Keep the blade(s) clean and honed sharp. Old plant sap needs to be wiped off at the end of use.
  • Do not twist the secateurs to cut through a stubborn stem as it can strain the blades.
  • You need to find your secateurs when you put them down so choose a bright colour or add some paint to make them visible.
  • Select a pair with good feel and balance – they will work better and so will you.
  • After use give then a spray of WD40 or plunge in an oil/sand tray.

Types of Secateurs

  • Cheap secateurs start from under £5 but you get what you pay for. A top line Felco pair will cost around £45.
  • Anvil secateurs have only one blade which closes onto a flat surface or anvil as in the picture above. They are reputed to crush the stem but I like them for many jobs particularly chopping down stems for the compost heap.

bypass-secateurs-038

  • Bypass secateurs work exactly like a pair of scissors with one blade passing the other to make the cut. At least one of the blades will be curved with a convex upper blade and either a concave or straight lower one.
  • Parrot-beak secateurs consist of two concave passing blades which trap the stem between them to make the cut. These are suitable only for narrower stems and intricate work.
  • Bonsai have there own pruning tools including leaf cutters like miniature shearing shears and sharpened pincers.


wet-stone6

Maintain Your Secateurs

  • Anvil secateurs remain reliable when slightly blunt but are easy to sharpen on a wet stone.
  • Use an oil stone or wet stone to sharpen the blade.
  • Two types of wet or oil stones are shown above.
  • The liquid quickly makes a grinding paste which is how the blade is sharpened
  • Normally 5 or 6 strokes will be enough to hone an edge but when renovating an old pair like the ones in the picture more effort may be required.
  • Only sharpen the outer blade on bypass secateurs.
  • Clean off sap and plant juice before putting secateurs away.
  • I spray moving parts monthly with WD40 to keep them in good condition


Felco and other Secatuers from Amazon link


Flash Colchicum speciosum or Autumn Crocus

Flash Colchicum speciosum or Autumn Crocus

Colchicum speciosum produce autumn crocus flowers before any leaves. These plants were grown in a pot for display at alpine garden shows and competitions.

Autumn crocus

Photo Tips with Flash and Without

  • This photo was taken without a flash on the camera whilst the photo below had auto flash.
  • The colours appear more saturated if you can hold the camera still enough to avoid using a flash. Flash can burn out detail.
  • If information is available such as the variety name keep a record – I forgot
  • If the plant is in a competition or you know the name of the owner give them a credit. (West Yorkshire AGS group autumn show again I forgot the entrants name).
  • Use a plain back ground – I borrowed someones green card but I may carry a grey sheet for future.
  • Take care with framing, the plants are not going to move. My third mistake compounded by not cropping the resulting photo.

Autumn crocus

Colchicum speciosum is native to mountainous areas of northern Turkey. Do not collect wild specimens but acquire from cultivated stock or grow your own from specialist seed suppliers.
Other names for Colchicum speciosum include “Naked ladies” and “Meadow Saffron”.
Growing Colchium as Alpine Pot Plants – Colchium have 6 stamen crocus only 3.
True autumn crocus

Hosta Flower Arranging Gardeners Tips

Hosta Flower Arranging Gardeners Tips

There is a wide range of gloriously leaved Hostas that gardeners can grow for flower arranging. They produce large clumps of superb foliage and it is hard to decide which varieties to grow as you are spoilt for choice.
Hostas provide colour size texture and flower spikes so what is not to like?

hostas

Starting and Cultivating Hostas For Flower Arranging

  • Plant during October to March in sun or shade.
  • Mulch the plants and water generously. Hostas like water and damp soil but this and the taste of leaves makes them very attractive to slugs and snails.
  • Grow in pots if slugs are a real pest and you can’t control your slugs and snails any other way.
  • Use any type of soil but add manure or spent mushroom compost to the planting hole
  • For more on Hostas read ‘Growing Hostas’
  • Thompson & Morgan supply plants and seeds.

Conditioning and Arranging Hostas

  • Read more on Hostas for flower arranging
  • By the end of May little conditioning is needed other than a long drink
  • Put the ends of young stems in the early stages of growth in an inch of boiling water, then submerge them overnight. Place in a polythene bag for several days to stiffen them
  • Flowers last well without treatment.
  • Leaves can be pressed in autumn between sheets of blotting paper.
  • Most leaves are useful in a green group to add light and texture.
  • Flower stems with their pendulous bells are good for mixed groups

Hosta flowers

Varieties of Hosta for Flower Arranging

  • Hosta Thomas Hogg and albo-picta have variegated edges. Hosta albo marginata has a white edge to a smaller leaf.
  • Miniature and small host varieties are worth seeking out and growing for smaller arrangements.
  • Hosta sieboldia Elegans is a grey leaf and there are yellow, blue and a multitude of green leaved varieties.
  • Jurasic Park, Prince of Wales and Blue angel have big blue leaves
  • Captain Kirk has lime green leaves mixed with a strong yellow.
  • Try Bowden the supplier with a Royal Warrant
  • Dahlia Flower Arranging Gardeners Tips

    Dahlia Flower Arranging Gardeners Tips

    The pompom and decorative types of Dahlia are the best for flower arranging. The large headed flower types are difficult to arrange.
    There is a tremendous variety of colour and shades to suit every decorative scheme. Grow varieties and shades that suit your house.
    Eden Project Dahlia

    Starting and Cultivating Dahlia

    • Plant late May or June. The larger plants will need staking.
    • When plants are 12-18″ high nip out the growing point to encourage side shoots which become flowering stems.
    • Mulch the plants and water generously. Fortnightly foliar feed is recommended.
    • Lift tubers in winter and store frost free. Large tubers can be divided before replanting.
    • For more on Dahlias read easy and easier dahlias even though the even-easier dahlias are grown from seed.
    • Thompson & Morgan supply plants and seeds.

    Conditioning and Arranging Dahlias

    • Dahlias like a little sugar in the water.
    • An asprin or drop of bleach in the water will control algae growth. Change water every other day.
    • Put the ends of the stems in a little boiling water, then give them a long, deep drink.
    • The bright colours mean they can be used as a focal point in a mixed display
    • Dahlias are free flowering and provide a good supply so we prefer large bunches.
    • Pink Dahlias seem to blend well with purple, red and other pink flowers

    Dahlia

    Varieties of Dahlia

    • Some Dahlia are better cut flowers than others. Single flowers often do better than doubles.
    • Older varieties to consider include Angora cactus type, Lilac Time, Gold Crown and Chorus Girl
    • Red varieties Doris Day and Cherry Ripe or white Polar Bear are said to be good doers.
    • I have seen Trentonian, old gold and copper; Waverlet Pearl, apricot; Isabel McElney, salmon pink and Fancy Free, pale copper also recommended.

    Turn your arrangements into botanical works of art – here are some examples and clubs you could join.

    To grow a generic mix of flowers for arrangements and bouquets check out Thompson & Morgan

    Alstroemeria Flower Arranging Gardeners Tips

    Alstroemeria Flower Arranging Gardeners Tips

    Alstromeria

    Ligtu hybrids are the plant of choice to grow for flower arrangers. Once established these perennials clump up to give a profusion of multi-headed flowers. The colour range (see photogenic flowers) is impressive ranging from cream, red, orange shades of pink and mottled colouring.
    Growing on tall stems up to 3 feet long Alstromeria make lasting and colourful cut flowers.

    Alstroemeria

    Starting and Cultivating Alstroemeria

    • Always buy pot grown plants and take care of the roots when planting. They have both thick juicy roots and hairy feeder roots that are quite delicate.
    • March or April are good months to plant in a sheltered spot.
    • Pick sparingly in the first couple of years to allow plants to build up.
    • You can support with pea sticks but I find my varieties stay erect and firm.
    • Cut or pull out stems that have finished flowering.
    • For more quick growing tips read link.
    • Thompson & Morgan supply plants and seeds. Seeds need patience and some skill.

    Conditioning and Arranging Alstroemeria

    • A long drink in deep water after picking is all that is really needed.
    • Seedheads can be attractive. Dry them upside down then they can be used in full length arrangements or as individual florets cut off for smaller displays.
    • The bright colours mean they can be used as a focal point in a mixed display
    • Alstroemeria look good in a vase of there own with a little green foliage
    • Alstroemeria can be left long stemmed or cut short for different sized displays.

    If you do not have green fingers then you can buy Alstroemeria from florists. They may have been grown in Columbia or Peru (they are called Peruvian lilies after all) but they should still last several weeks. Turn your arrangements into botanical works of art – here are some examples and clubs you could join.

    To grow a generic mix of flowers for arrangements and bouquets check out Thompson & Morgan

    Tricks of the Garden Centre Trade

    Tricks of the Garden Centre Trade

    Chevin garden centre

    I have observed several tricks of the Garden Centre trade and I am sure there are many more. I am only concerned with those that damage or discourage gardeners unnecessarily. To remain in business nurseries and garden centres need to work with gardening customers not against their best interests.

    Dubious Habits and Tricks

    • Putting stock out for sale at the wrong time. This is most prevalent in spring when plants ‘grown soft’ in a hot house environment are put out for sale and to die a premature death unless over cosseted by the buyer.
    • Selling stock too late in the season for the gardener to get any value from the purchase. This often applies to exotics which have only a narrow flowering window and need an expert to get back to any form of glory.
    • Dressing plants up cosmetically just to move the stock. e.g. Early pruning of diseased leaves without treating the cause.
    • Selling bare root plants plonked in a pot with loose compost but no new root growth.

    Good Habits and Tricks

    • Keeping the tops of pots weed free and able to absorb appropriate watering.
    • Selling timely plants that have been hardened off. I do not want a Dutch glasshouse plant straight off the lorry if it is not going to thrive.
    • Specializing and growing their own stock that the garden centre fully understands and being willing to pass on the knowledge.
    • Good trained staff, sensible opening hours and a tidy display of healthy products.

    Help us Learn More Tricks

    If you have fallen foul of a trick or dubious practice let us know.
    If you have received excellent service let us know.
    If you are a garden centre or nursery and want to raise a point similarly let us know.

    Growing Trillium Spring Flowering Perennials

    Growing Trillium Spring Flowering Perennials

    Trillium.

    Trillium are idea plants for woodland gardens or a shady border. The three petals produce an interesting triangular pattern often enhanced by the three sepals that cover the bloom and open to allow the flower to shine through.

    What are Trilliums and how to Care for Them

    • Trilliums are a species of rhizomatous, herbaceous perennials.
    • The large green leaves are often mottled with maroon markings.
    • Trilliums thrive in deep, moist, slightly acidic soil and originate from North America and Asia.
    • Trillium should be planted when they have plump rhizomes and fresh roots that haven’t been allowed to dry out.
    • They respond well to good feeding with organic matter.
    • Trillium are also known as Wake Robin, Birthroot and Toad shade.

    Best of 60 Varieties

    1. Trillium luteum (agm) has long lasting lemon scented, narrow yellow flowers. Flowers sit above ovate, patterned green leaves and plants grow about 12″ high. The flowers are long lasting with a lemon scent.
    2. Trillium errectum (agm) is generally dark red or purple as above and forms a large clump over time. Do not pick the flowers as the plant needs all the energy it can muster to grow for next season. This variety is one of the more vigorous at 18-20″ high and flowers in early spring with resistance to some frost.
    3. Trillium Grandiflorum (agm) has large cup shaped white flowers with green sepals and wavy petals. The flowers can light up a shady spot and contrast well with the dark green foliage.

    trillium

    Advice from RHS on Trilliums

    ‘Although trilliums are moisture lovers, they will not tolerate waterlogging.

    They will not thrive on heavy, wet clay soils. Planting in raised beds is a solution. Another is to dig out the clay to a spades depth and fill with a mixture of loam, garden compost, well rotted manure and composted bark bulked up with sharp sand. Mound the material so it is at least 10cm (4in) above the surrounding soil level. This allows plants to root deeply but avoids them sitting in waterlogged conditions over winter.

    Trilliums should be planted about 7-10cm (2 1/2 – 4in) deep. The best time for planting is late summer as it gives the rhizomes time to establish good root systems before the following growing season.

    Keep well watered during dry weather in spring and early summer. Apply an annual mulch of well decayed organic matter in early spring. A light application of a balanced fertiliser in late winter is also beneficial.

    Trilliums do not really thrive in containers as they prefer a moist, rich garden soil. But you can try them in pots of sandy loam, such as John Innes No 3 with added gritty sand.’ (see below)

    Trillium

    Feed your Fruit Trees so your Fruit Feeds You

    Feed your Fruit Trees so your Fruit Feeds You

    Think of all the fruit your trees and shrubs produce and then equate that to the goodness that must have been taken out of the soil. Now consider the effect of heavy and continuous rain that leaches away nutrients particularly nitrogen and potassium. So a bit of extra feeding is in order. This can only help your fruit trees and bushes feed you with juicy fruit.

    Why Feed Fruit Trees

    Healthier bushes and trees produce bigger and healthier fruit.
    Correct feeding encourages blossom and flowering.
    Feeding helps create disease and drought resistance making your plants stronger.
    Feeding replaces the goodness taken out by heavy cropping.
    Mineral deficiencies can be corrected such as the yellowing between the leaf veins in early summer due to magnesium deficiency. For that use a foliar spray of Epsom salts with a teaspoon of washing up liquid as a wetting agent.

    Feed your Soil to Feed Fruit

    Sandy soils have an open structure that allows water and nutrients to drain through quickly. Mulch with well rotted compost to improve the soil structure whenever you can.
    Clay soils are slow to dry out (or warm up in spring). If they are waterlogged the nutrients dissolve into the ‘soup’ but that drains out as the soil dries just when the fruit need feeding. Again compost helps the soil structure.
    Sour soil will compact forcing water to run away. It mat also become covered in moss. Clean up the area and again add a well rotted organic mulch.

    Apple blossom

    Gardeners Tip Feeding Fruit Trees

    Soft fruit need high amounts of potassium for bud and fruit development.
    Stone fruit, pears and apples need potassium and extra nitrogen.
    Sulphate of potash or rose fertiliser in granular form is a vital feed. Add a top dressing, of 1 oz per square yard, to the surface of well forked soil around the rooting area which is just beyond the branch canopy.
    Feed in late winter when the soil is moist and the fertiliser can be taken up as the fruit start to grow.
    Use liquid tomato feed or other high potash content liquid feeds in summer for a quick boost.
    Apples like nitrogen so feed with Growmore at 5oz per square yard or use sulphate of ammonia if the soil is in poor condition.
    Think about each individual tree’s needs and treat it to a mulch and feed accordingly.
    Phosphates are usually available to your fruit from most garden soils most of the time!
    Avoid over feeding that creates sappy on sustainable growth. An annual feed is more than enough if your soil is in good heart.

    Autumn apples