Notes from my Seed Bank
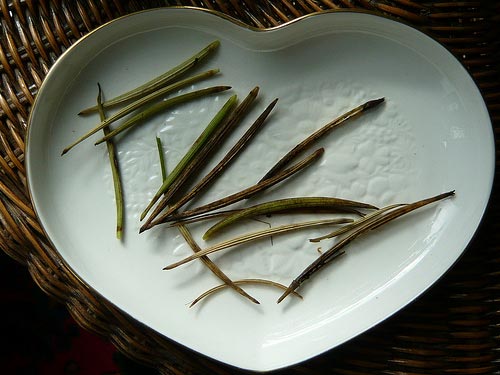
Collected Californian poppy Eschscholzia pods and seeds
January Review of Seeds in my Seed Bank
- Many gardeners me included have collections of seeds from last year and prior. This is a summary of how I started 2020
- Alliums of many varieties not kept separate – all destined for my daughters newish garden as requested.
- Some kept in a plastic box without being fully dried off. They don’t look too healthy so ditched them on compost heap where they could have gone much sooner.
- Some well dried off and now labeled.
- Set up a metal box for all bought and some dried seed
- Best seeds were runner beans – will use largest for this year. There were more than I will need to get a reasonable number of plants.
- Several packets of annuals bought in the autumn sale – particularly those that can be expected not to have aged. I planned to be sowing in spring and am now very grateful for the stock as I can’t go out and buy more.
- Empty packets of various autumn sown seeds Calendula, sweet pea, wallflower, etc
- Saved seed from those plants I want to repeat, livingstone daisy, salvia, lupin, cosmos,
- Specials to try to cultivate yellow tree peony, pieris and collected shrub berries from nature walks.
- Salad leaf mixture, 6 varieties of tomato, climbing beans, broad beans etc.
Tips
- Save in envelopes for better dry storage. Make sure they don’t have open corners I used school dinner-money envelopes and they leaked
- Keep seeds separate and label with name and date
- If seeds decanted from the original proprietary packet keep the bit of instructions, name etc.
- Don’t use plastic bags in future they sweat and help cause rot-dry off seed before storing.
- Take care with the usually good sweet pea seeds this year they all had maggots in them.
- Separate dry seed from husks and pods.
My Personal Planting Tips
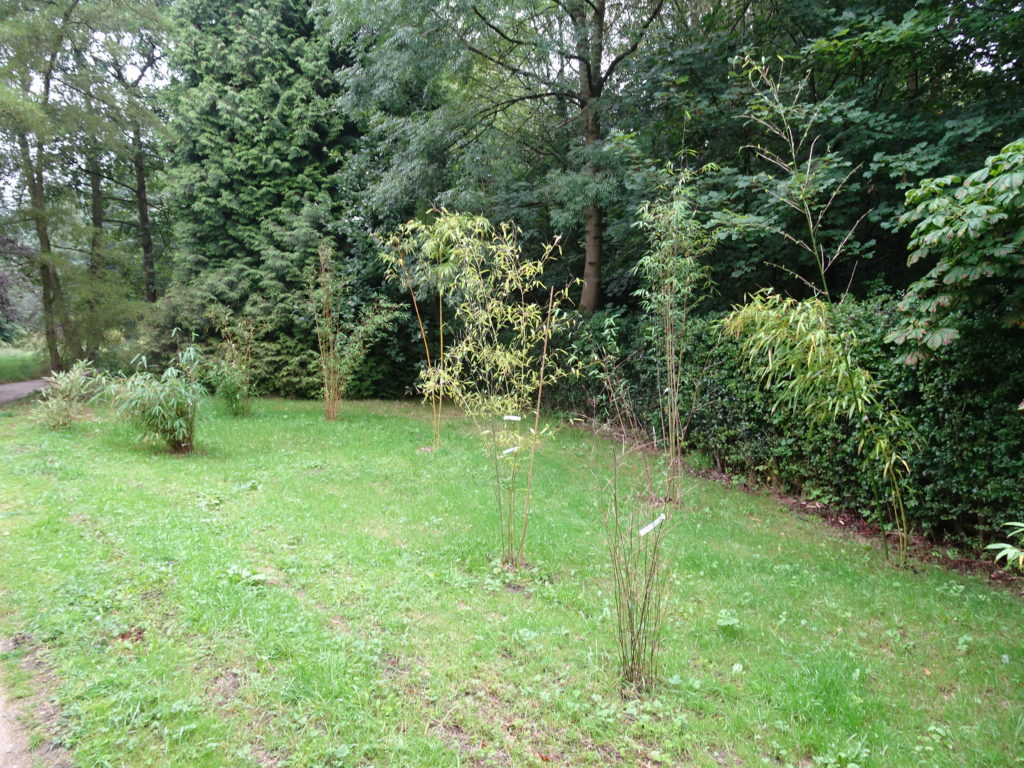
Bamboo in a sheltered Glade
Shrubs and Trees
- ‘A good big one is better than a smaller one’ is an old yet valid quote and also applies to the size of a planting hole. Give room for the roots to spread. Brake up the bottom and sides of the hole, mix in some slow release fertiliser and puddle in (lots of water in and around the plant. Firm down the soil and offer support with a stake.
- A good big one quote should not be taken to extreme for new shrubs and trees. The larger the plant the more susceptible it will be to drought and wind damage. Over time most smaller plants will catch up and have suffered fewer ‘checks’. On large forced shrubs the root systems may not be strong enough to cope with a large head of leaf, fruit or flower.
- I prefer autumn as a time to plant when the soil will provide a warm home for new roots and rain will help with watering.
- Water new plants regularly and thoroughly. A slight depression around the plant will create a saucer effect. In dry situations they may need help for 12 months or more. Do not risk new plants dying from drought.
Protecting the Newly Planted
- Young trees need the support of a stake or cane. Wind rock can damage the tender roots and growth will be damaged by prevailing wind. Stake on the windward side and tie with soft string at least one third up the stem.
- Errect a wind break if the garden is exposed.
- Protect from animal damage with a plastic stem protector and slug pellets.
- Plant in groups rather in singles to get some mutual protection.
- Mulch to protect the soil temperature and moisture content.
- Keep weeds under control.
Planting out pot grown plants
- Before planting out give all new plants in pots a good soaking. Beware it can be hard to get water to soak into the center You do not want to find the plant dying with a dry root ball in a few seasons time.
- Pot bound plants are those with the root twisting around inside the pot and most of the nutrient and compost consumed. Roots may be forcing their way out of the bottom of the pot or making plastic pots distort. They will struggle to get out of this vicious spiral/circle when planted out. The best solution is to tease out the roots on the edge of the root ball. If it is too tightly wound then break out any remaining composts and spread all the roots as best you can.
- Garden centers are businesses and some get up to dubious tricks. Small and immature plants that have recently been repotted into larger pots to make them seem more valuable (for that read pricey). Before buying support the plant and invert the pot to see if the root ball crumbles.
- I put some mycorrhisal root growth aid in the hole to encourage roots to grow away from the root ball.
- Bare rooted trees and shrubs are often the best way to plant fruit trees, hedges and roses.
I’m Potty About Watering My Pots
I have 35 good ceramic pots and numerous plastic pots and containers dotted around the garden. There is a 3 foot wide path all around the house that hosts many of these pots on a permanent or seasonally temporary basis. I enjoy ringing the changes about location and container content. What I don’t enjoy is watering the pots! Since the floods early in the year we have had scarcely any rain in Yorkshire and the ground is now dry and cracking up. Looking at the forecast April looks like being a shower free zone never mind a good soaker.
A plant pot that needs more water
Why Pots get Dry
- Too little soil or compost to retain enough moisture often because the pot is too small
- Compost too free draining eg sandy or gritty soil. Compost need some ‘heart’ to retain water.
- Porous terracotta pots that allow water to be sucked out through the sides
- Pots in too much sunshine with no shade
- Pots placed in windy or draughty conditions
- Plants with lush leaves that transpire readily and need copious amounts to drink.
- Root bound pots or those filled with roots leaving no room for water soaked compost.
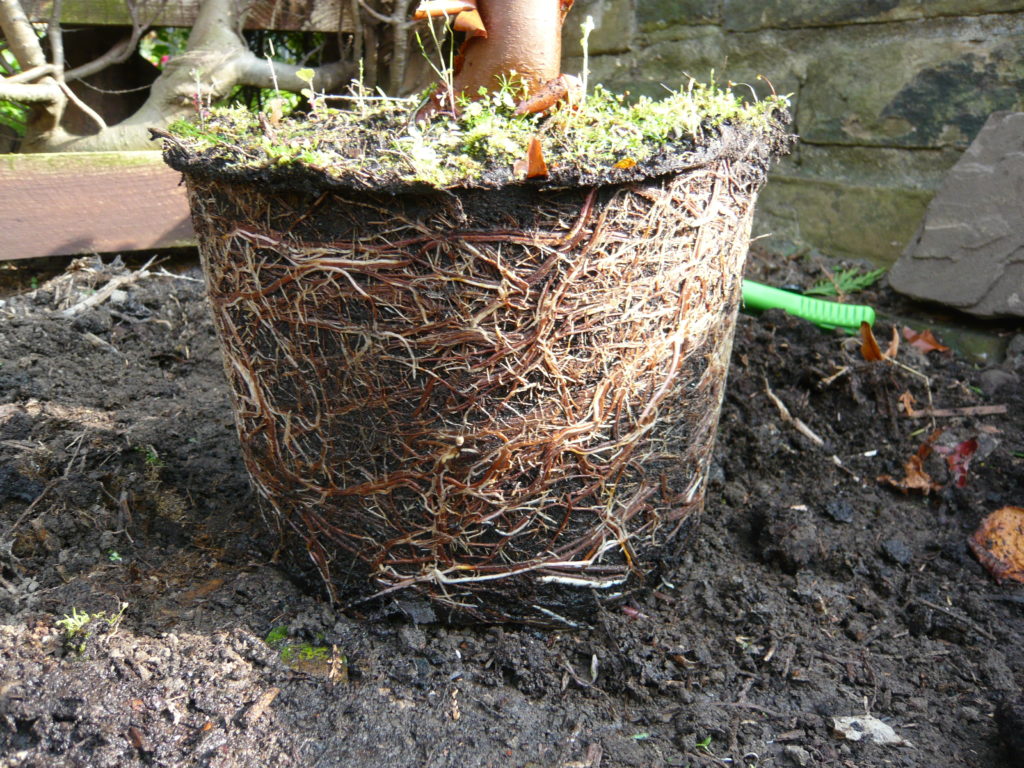
Excess roots and weed cover restricting water content
Watering Pots
- These comment apply to varying degrees to most ceramic, clay, terracotta and plastic pots, containers, hanging baskets plus similar plant containers.
- You may notice pure peat or coir is very difficult to get evenly wet. Commercial composts have a wetting agent added during packing so this problem is initially circumvented
- If pots get dried out the compost is very hard to re-wet. A deep soak for 12 hours is probably the best way to totally rehydrate the soil but that is not always possible. Damp compost will take up more water. Very dry soil sheds the water or lets it run right through. I start with a light wetting or dampner on the surface then 10 minutes later water properly.
- Special care is very important specifically if the compost has shrunk away from the sides of the pot.
- The problem of hanging baskets being difficult to re-water once they get a bit dry has a simple solution which is to use a wetting agent or a small dash of washing up liquid in the water .
- Preventing drying out in the first place is as better step.
- Drip or electronic controlled watering would be a top end solution.
- A saucer under the pot would be a cheapo solution.
- A community of pots to create a micro climate and increase surrounding humidity can help.
- Placing the pot on soil or capillary matting would allow some leaching from the surrounding area.
- I use a wick system for pots in the greenhouse with a strip of capillary fabric or matting trailing from the middle of the pot surrounded in compost with the end trailing out of a drainage hole into a sump of water.
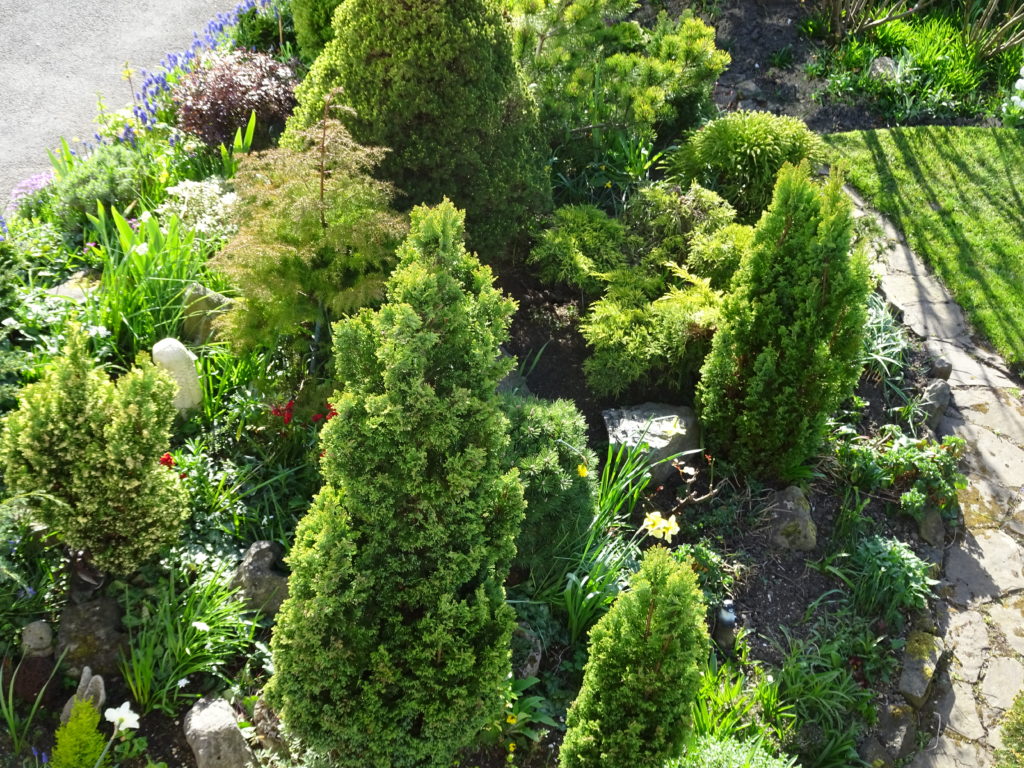
Rock On With My Garden
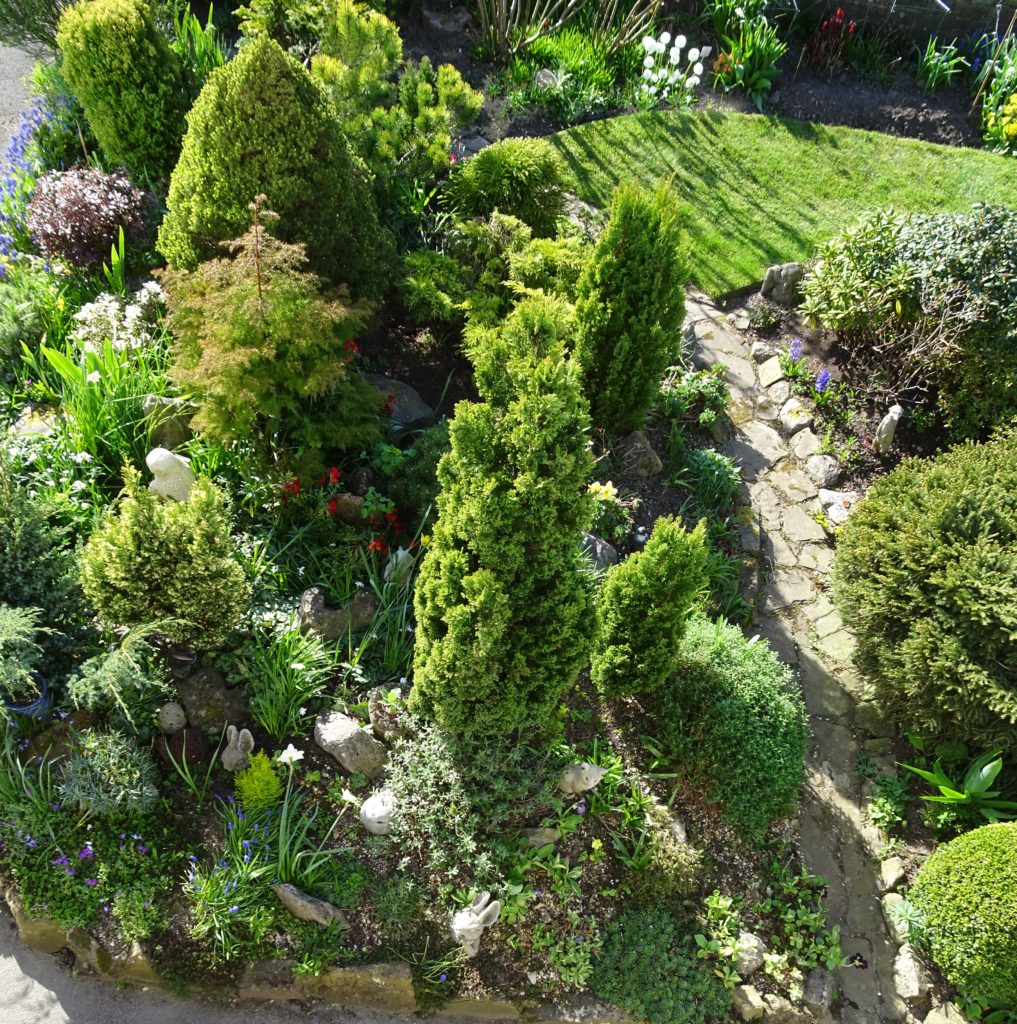
Dwarf Conifers in a Rock Garden
For over 25 years I have gardened a rockery or rock garden on a triangular patch of poor soil. I progressively scrounged and collected a range of granite, limestone and sandstone rocks and added them piecemeal. I aspired to growing alpine plants and recognised good drainage and shelter from winter wet weather would be key but that is as far as my planning would go. For the first couple of decades I was busy at work and wasn’t able to put in the effort of looking after small but hardy alpines.
One of the consequences of this lack of time was that I took the easy way out and planted ‘Dwarf and slow growing conifers’ that were a popular fad at the time. I also supported many alpine nurseries with my often ill chosen plant selections in attempts to buy a ready made garden feature. Latterly I joined the Alpine Garden Society and took advantage of shows and seed exchanges.
Then a latter stage crept up on me. The 10-20 year old conifers started to take over in scale and dare I say interest. Firstly dwarf can be a misnomer just because a conifer is small when planted it may very well just be a slow grower that has higher ambitions. I true dwarf conifer is a genetic feature of some species and are worth seeking out at the expense of other mass grown shrublets. Over time I dug out the larger and more boring specimens but still the alpines became less significant. I now have 20+ conifers of varying forms, colours and species taking over the alpines. The highest is 6 feet tall and may be the next for the chop one is low growing but spreads 5 feet wide and a favorite on mine is only 9 inches high. The space is still approximately 200 square feet but is extending into and adjacent bed past the crazy paved path.
Ideas for Rock Garden
Special Seed Sowing Survey
I thought I would just list some special tactics to try increase successful sowing activities. After all ‘Tis the season for sowing summer annuals and so on’.
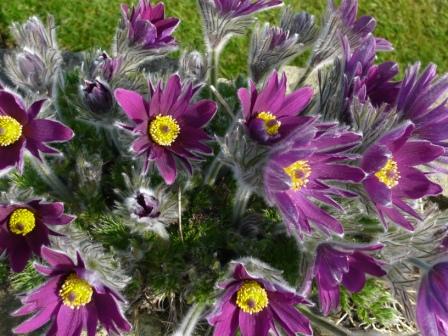
Pulsatilla or Pasque Flower
Special Seed Sowing
- To chit, nick or sandpaper your sweet pea seeds, that is the question? I often settle for a pre-soak to get through the hard coating and swell the hard seeds. The RHS video recommends nicking with a pen knive but each to their own. I did well last back end just planting ‘cupid’ in compost without any preparation.
- Seeds with a long awn such as Pasque flowers germinate better if they are individually speared into compost not sown flat. With warmth and wet the awns twist the seed deeper into the soil.
- Flat seeds like lilies have a papery wing covering the fertile grain. The germination will improve if the seed is inserted edge ways and not flat.
- Many seeds like to be sown as soon as they are ripe, after all that is natures way. Primula, Lewisia, Ranunculus and gentians are best sown from ‘pod to pan’.
- Cyclamen seeds are covered in a sticky substance to reward ants that move them from the host plant. Germination may be better if this glue is washed off before sowing.
- Pollinated Orchids can take up to a year for the ovary to swell and ripen. Then the fun starts as your harvested seed is best sent to a seed laboratory for germination and return as pricked out seedlings. It can also take a further 5 years to reach the flowering stage dependent on the variety.
- Many seeds that can’t be sown immediately can be stored in a dry container in the fridge. Some benefit from a good chill as this replicates winter conditions.
- I message to myself – SOW SEEDS THINLY
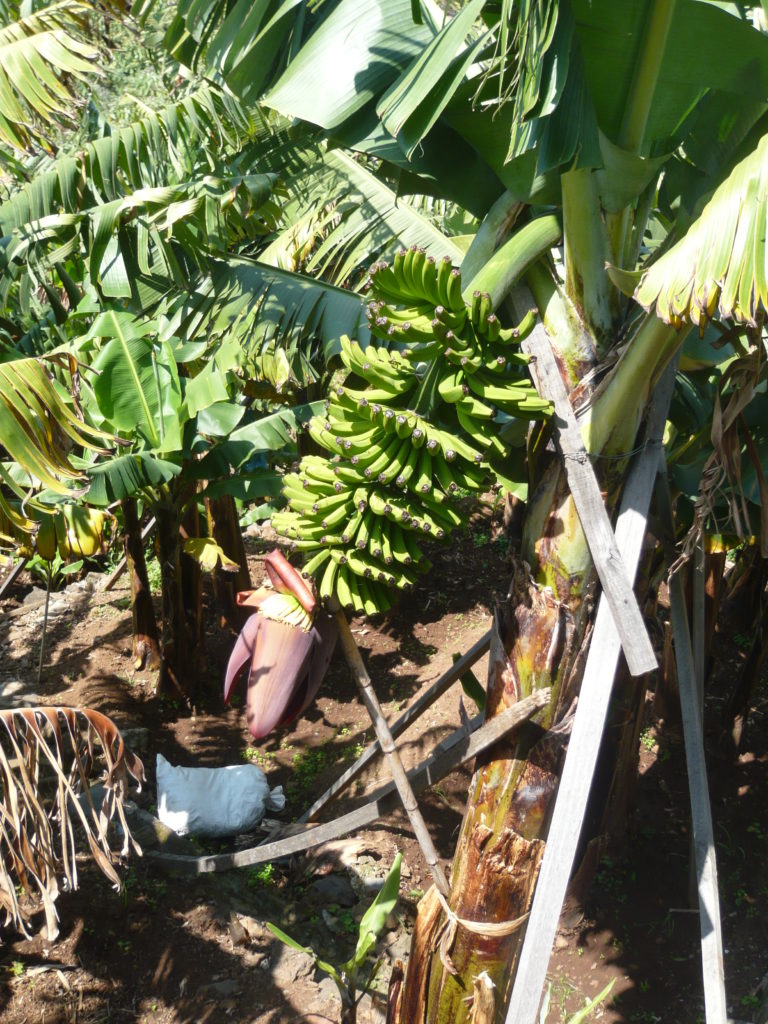
Virtual Madeira Garden Trip
I wanted something to look forward too and another trip to Madeira seemed appropriate. For the time being a virtual trip to this garden paradise of an island must suffice.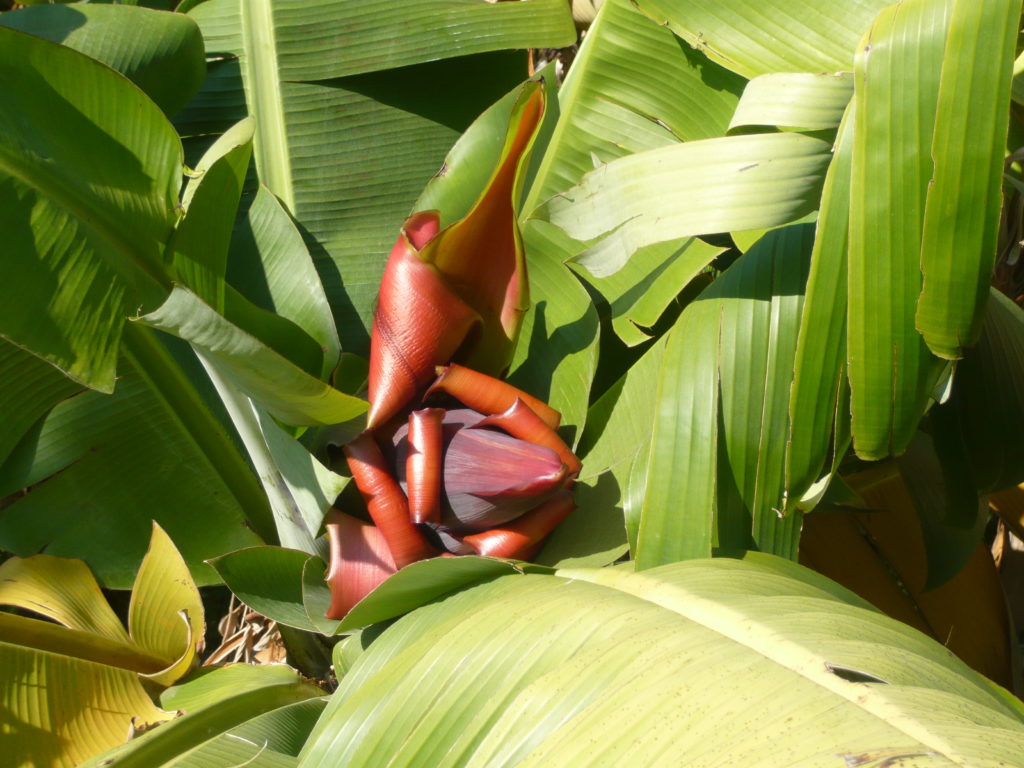
In a hurry no time to eat unzip a banana
Orchid House Quinta Boa Vista

Snap – Snap
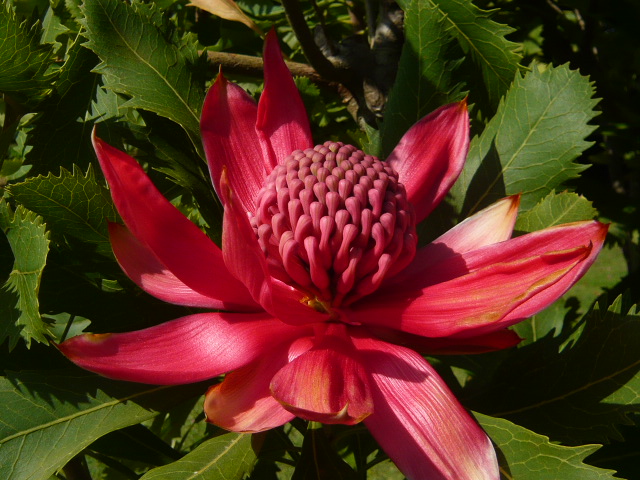
Don’t you hate it when you forget the name of a plant

I Do Like to Garden by the Sea
Oh I do like to be beside the seaside, oh I do like to garden by the sea -Tiddely om pom pom. Seaside gardening has its challenges and it has it’s rewards as my west coast brother-in-law knows. (At the age of 82 he is thinking of giving up his gardening business to concentrate on his own relatively new garden).
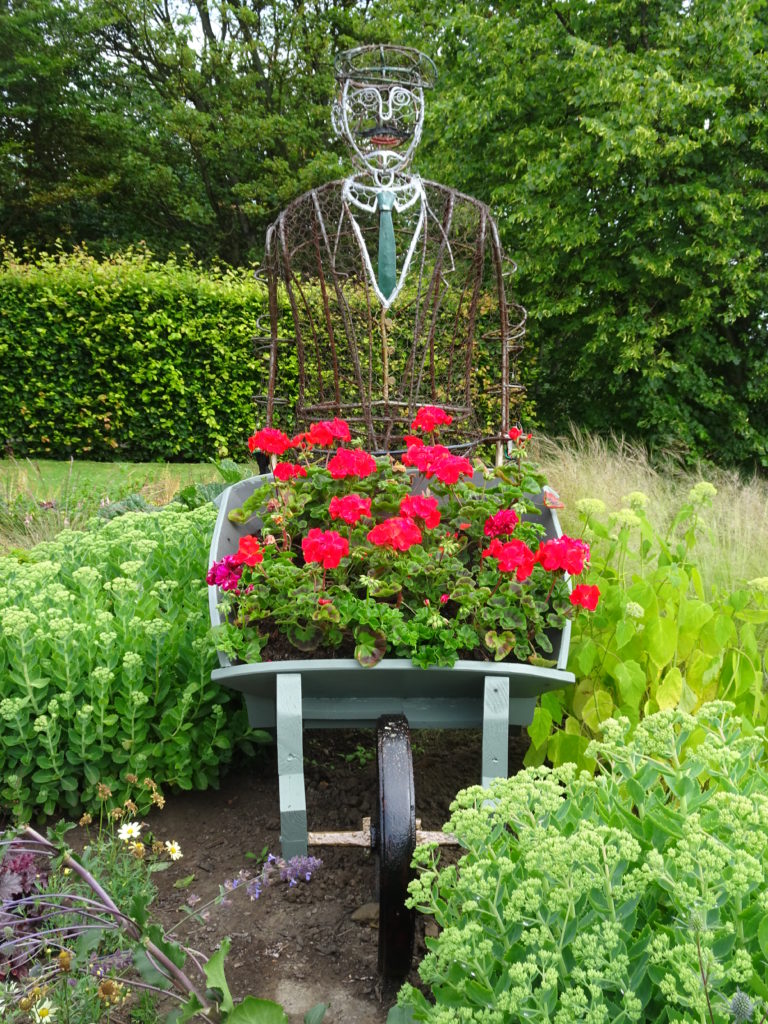
The Filey Seaside Gardener
Seaside Gardening Challenges
- To garden by the seaside you face virtually all the challenges inland gardeners face and then some.
- The first to single out is the salty air borne on winds that have blown over the sea to deposit there munificence on your prized plants. Salt is not a natural fertiliser! Salt is not a natural plant killer although you may come to think that it is so if you plant the wrong plants.
- In the UK you may expect westerly winds around half of our coastline. However there are additional strong winds that blow on-shore on a regular basis to the detriment in the East, North and South gardens. Seaside wind is desiccating and abrasive as we know from personal wind chill effects.
- Sand dunes, beaches and sand castles amuse the children but sandy soil is a garden staple that adds to the challenges. Such soil has little humous, hold little water or goodness and is desiccated so lacking in nutrients.
- Geological and geographic features need to be contended with including the possibility of a high water table, limey seashell based soil or pebbles and rocks. The worst issue of the moment is soil erosion on the East coast where your cliff top garden or allotment may crumble into the sea.
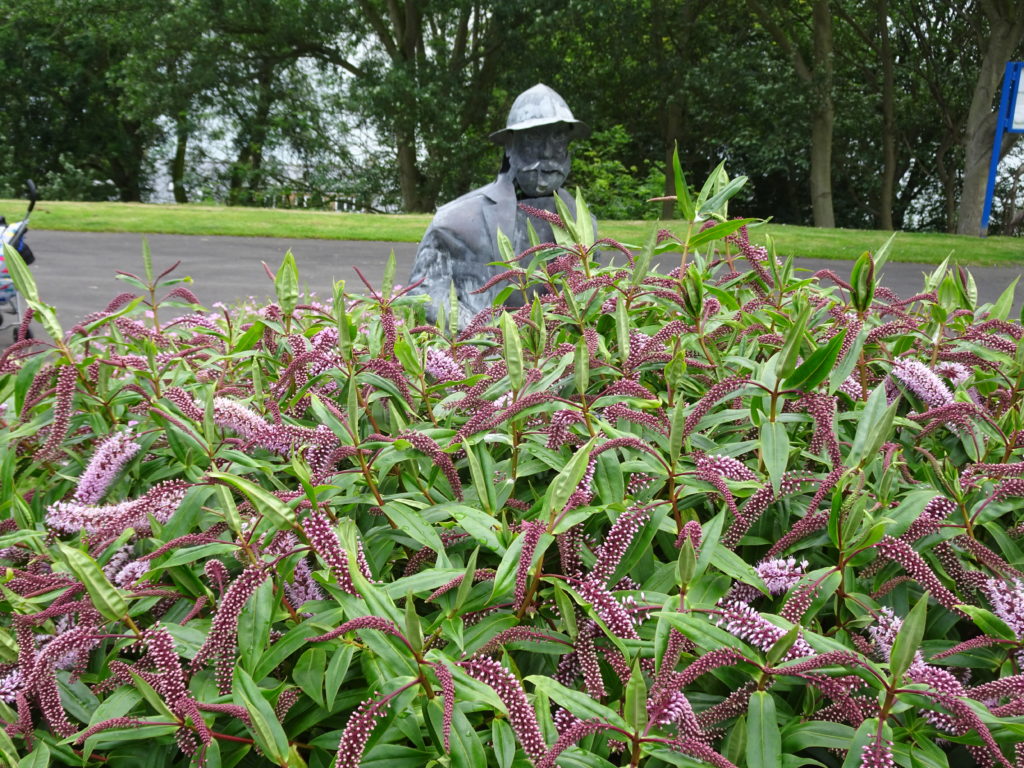
The Filey Fisherman’s Friend
Seaside Gardening Rewards
- Defeating the challenges or holding them to a scoring draw is reward in it’s self (or so I’m told).
-  Others common plants will do far better at the seaside than one expects. Hydrangea macrophylla can do well despite the lack orf water as do annual plants chosen for public gardens by tourist minded local authorities. See our selection of Perennials for the seaside from gardeners tips 2012. Careful plant selection could even introduce some new species to even the most avid gardener.
- There are far more detailed selections in the book ‘The Seaside Gardener’ by Richard Mortimer
- There can be special rewards from the introduction of wind breaks. Walls add height to a flat landscape providing scope for climbers or crevice plants. Selective planting of trees and shrubs will be rewarded by breaking the flow of the wind and possibly directing it up and over your patch.
- The proximity of the sea can provide some winter warmth to keep the worst of the frost at bay. On the other hand you may suffer from a sea fret that prevents you from seeing your garden.
- Low growing locally successful wild plants will do even better with your tender care.
Odd Seaside Gardening Tips
Bigger than the Biggest Aspidistra
What I am talking about are plants that are bigger than the biggest aspidistra in the Gracie Fields song book. They represent examples of the biggest natural organic organism in the world. I have three candidates for your consideration a couple of which may surprise you.
-
- Honey Fungus, Armillaria mellea, Armillaria ostoyae, and Armillaria solidipes also known as the humongous fungus, “honey mushroom†or “shoestring fungus.â€Â The largest measured example of unique DNA is believed to be in Oregon’s Blue Mountains. It is thousands of years old stretches, over 3 square miles, weighs 100s of tons, grows 10 feet deep and is acknowledged as the largest land organism on the planet.
- A plant in Fishlake National Forest colorado forms a colony of clones of Populus tremuloides also known as Quaking Aspen, Pando or the Trembling Giant; it weighs in at an estimated 6,000 tons and may be up to 80,000 years old. Clones and genet have identical genetic make-up and are a single living organism assumed to have one massive underground root system. Â
- Honey Fungus, Armillaria mellea, Armillaria ostoyae, and Armillaria solidipes also known as the humongous fungus, “honey mushroom†or “shoestring fungus.â€Â The largest measured example of unique DNA is believed to be in Oregon’s Blue Mountains. It is thousands of years old stretches, over 3 square miles, weighs 100s of tons, grows 10 feet deep and is acknowledged as the largest land organism on the planet.

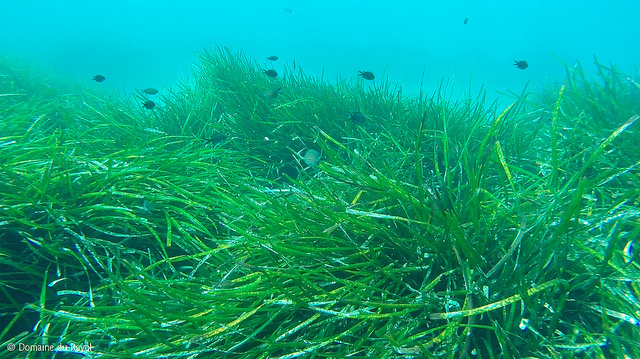
3. The third candidiate and world heritage site is in Ibiza and is a sea grass Posidonia oceanica also known as Neptune grass or Mediterranean tapeweed. Despite growing underwater it is not a seaweed but a grass that forms large underwater meadows in this case 5 miles long and over 100,000 years old. It is the largest example of a colnal colony
Other potential biggest aspidistras include The Great Barrier Reef, the world’s largest structure but is composed of a mixture many different living entities, the Giant Sequoia or amongst mammals the Blue Whale.
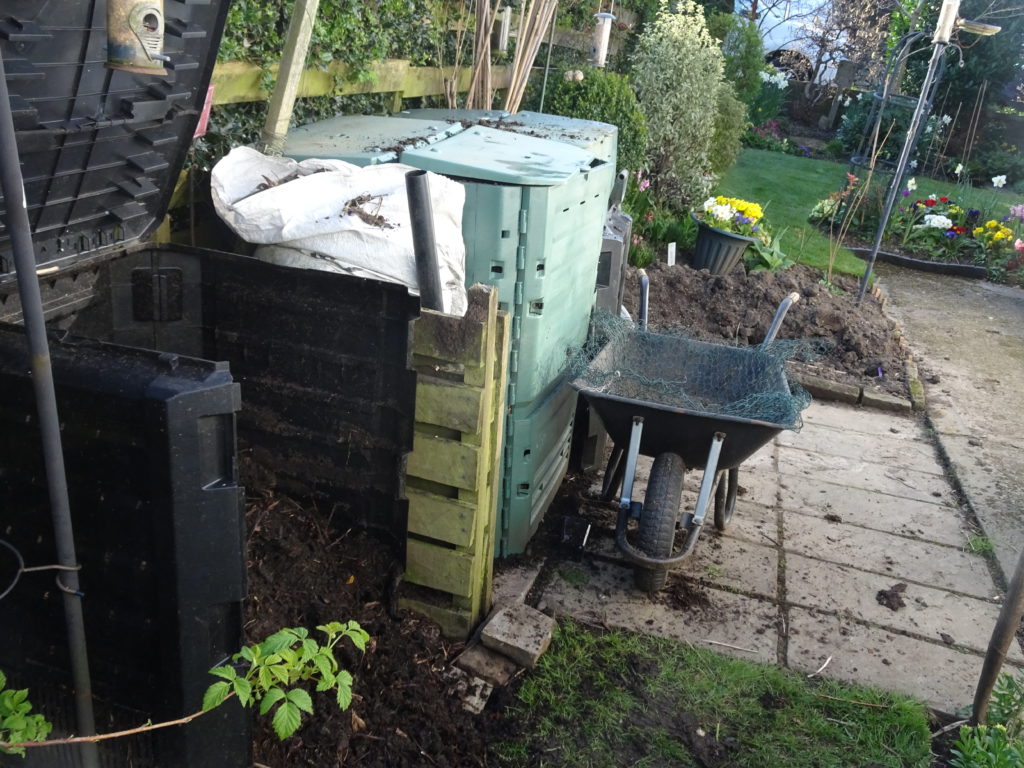
Rotten Rotters Musings of a Composter
I guess I am lucky to have 3 compost heaps and have had the ‘fun’ of emptying one over the last 3 days. It would probably have been better compost if it had been left a few more months but the other 2 were full or filling up rapidly. I wanted to trench out the bean and sweet pea ground both of which should benefit from the moist compost at their roots. Another reason for action was created by corona virus and the cessation of garden refuse collections and closure of local refuse tips by our MDC.
So what of rotten rotters or poor composters that I unearthed this morning.
Inert Items
- Not surprisingly plastics did badly, as, despite my efforts a clothes peg, several plant labels from garden centers and my own written identifiers had got into the bin. Other plastics including starch magazine wrappers, and stickers from exotic fruit that were discovered not yet if ever broken down.
- Every year I find at least one missing tool that I had probably spent an age looking for. Last year it was a precious Falco secateur that turned up with a bit of damage the month after I had bought a new one.
- The surprise of the day was 3 spectacle lenses and one arm. It beggars belief but perhaps I couldn’t see them when they fell in to the compostable clippings.
- The bin I emptied must have stood on soil where an old bird feeder had existed. The metal spike stabliser was now dug out with the compost. There was no more metal this time.
Natural Material
- It may be due to my impatience but Avocados give me the pip or should that be the nut. Whatever you call it the kernal takes more than a year before it cleaves into 2 unrotted hard pieces. The skin also fails to rot as quickly as all my other kitchen waste. They were nearly ready to go this time so I let them be.
- Moss lies dormant and will not rot. Short of burying it I must be dissuaded from putting the lawn grass mossy rakings from a wet winter in the now empty bin.
- I dug up an old tree stump but that won’t rot down in my lifetime so I may invert it and make a stumpery. Other thick woody lumps are not destined for my compost heaps.
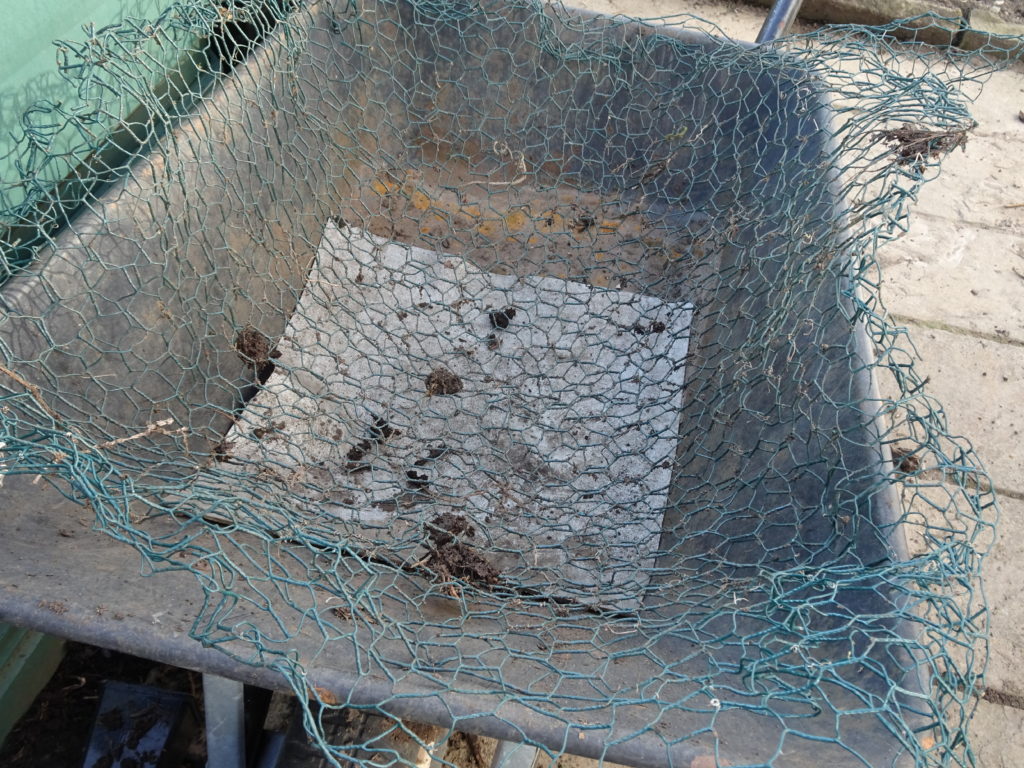 Home made compost sieve to remove rotten rotters