Browsed by
Category: Tips Hints and Ideas

Help for the new and not so new gardener

Quick-Fix Garden Spring Clean

Quick-Fix Garden Spring Clean

Some time spent maintaining the general appearance of your garden can be worthwhile at any time of the year. A clean tidy garden will put the focus on the plants and design of your garden rather that the bits that are out of place. Do not let the untidy catch the eye.

In early spring you get a good view of any structural problems and can correct any damage and untidy appearance caused in winter  whilst giving your hard landscape areas a bit of spit and polish.

A Bit of Timely Maintenance

  • Clean up areas that lead into the garden – steps, porch, paths and driveways.
  • Tidy paths and roads around the outside of the garden.
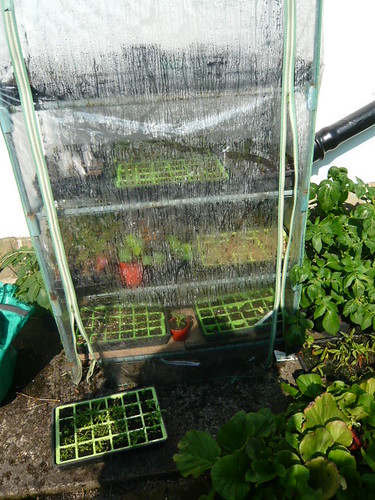
  • Tidy up the garage, car-port, greenhouse and garden shed.
  • Sweep and wash-down the driveway. Clean garden furniture.
  • Clear up overgrown paths, collect up old canes and prune back overhanging shrubs.
  • Repair broken fencing. Apply wood preserver where needed.
  • Tidy ragged edgings to make walkways and the driveway look smart.
  • Spray any weeds pushing up through gravel or tarmac.
  • If part of the garden is given over to pebbles, clean up the organic bits and pieces that work their way in between them.
  • Pick up litter and weeds from public paths around your garden edge.
  • Remove algae and slime from paths with a cleaners or pressure wash.
  • Mulch can cover a multitude of unsightly problems. Peat substitutes, bark or gravel can provide a face lift.
  • Gleaming windows give a house that groomed look. Brush down the cobwebs around the window frames and wash the paint work.

Organic Face Lift

  • Weed borders and garden beds. It’s easier to do just after rain when the ground is softer and the weeds come out easily, root and all.
  • Replace dead plants in empty beds and borders they are a sign of neglect. Hoe and rake the soil if you are waiting for new stock.
  • Rake the lawn to remove leaf-litter, twigs and other green debris.
  • Mow, weed and feed the lawn. Trim the edges neatly.
  • If you’ve let pot-plants die plant some ready grown annuals or herbs from a garden center.
  • Cut back tree-branches overhanging the driveway, paths and lawn area to make the garden look spacious and open.
  • Prune shrubs, dead stalks and stems. Make sure the shears are clean and sharp, it will make things easier for you and the plants.
  • Deadhead flowers and clear up any dead petals and flower-heads
  • Mulch makes plants stand out and is good for them . Invest in mulch for an instant makeover.


Product Reports

Path Cleaning and Cleaners
Garden Disinfectants
Best Weed Killers
Wood Care
Fence Care

Todays Top Ten Tips on Bulbs

Todays Top Ten Tips on Bulbs

3rd October 2011

Todays Top Ten Bulb Planting Tips

  1. Plant with the nose up!  (The bulbs nose not yours) The bottom of the bulb is where there is a bit of dried root.
  2. Put a marker in the ground to show where you have planted the bulb. I sometimes use some light coloured grit.
  3. Most bulbs already contain the ungrown flower inside the bulb so a bigger bulb should perform better. Choose firm healthy looking stock not dried out damaged bulbs.
  4. Plant your bulbs twice as deep as the bulb is large.  i.e.5cm bulb 10cm deep
  5. Pick a colour scheme and build a theme around that. Pinks and purples of crocus, tulips and hyacinths may work together.
  6. Alliums or ornamental onions can be planted in November or if frost free in December.
  7. Daffodils need longer in the soil to develop their root systems so get them in now.
  8. Plant bulbs in containers with good drainage holes and crocks in the bottom.
  9. Snowdrops, aconites, grape Hyacinths and crocus should naturalise well in your garden flowering year after year.
  10. After the bulbs have flowered deadhead then to channel energy into the bulb not into seed production. Leave the leaves to die back naturally.


Todays Top Ten Tips

Todays Top Ten Tips

September 15th 2011

  1. Sort out in your mind the plants that will need frost protection in the coming weeks. It will be too late to get and wrap plants in hessian or move plants indoors once the frost warnings arrive. Being prepared will allow you to enjoy late autumn shows without worry.
  2. If your Busy Lizzies suffered this year, loosing leaves and flowering badly you are not alone. The fungal problems of Busy Lizzies are a concern so do not compost them and plan to grow something else instead next year. Hopefully a one year gap will kill off the problem fungus which is Busy Lizzie specific.
  3. Keep harvesting your runner beans before they turn woody and run to seed.
  4. Collect any seed you hope to save from plants that have finished. Keep them in a cool place in paper bag or envelope
  5. Plant up your spring Daffodil bulbs. Tulips can be planted later.
  6. Indoor bulbs for Christmas flowering need to ‘be prepared’ or treated before you buy them. Hyacinth and Paperwhite narcissus are a couple of my favourites.
  7. Clean your bird feeding stations and plan to continue feeding through winter. I buy bulk seed and keep it dry.
  8. Look around for late flower shows and events. The Harrogate Centenary  flower show is on 16-18 September 2011.
  9. Glee, the UK’s biggest garden trade event, is on at the NEC  Birmingham  on 19-21 September 2011.
  10. Pick a bunch of Chrysanthemums or Dahlias for the house.

Chrysanthemum From Harrogate Flower Show 2010
Incurve Chrysanthemum

10 Tips for Taking Flower Photos

10 Tips for Taking Flower Photos

Rose with Dew

Taking flower photos is often seen as an easier aspect of photography. Even with a simple point and shoot camera you can have very good photos for little effort. However, these tips will enable you to get even better photos and push you into the ‘pro’ category.

Taking flower photos is very much a learning experience. I have added an extra two tips at no extra cost 🙂

Tips for Photographing Flowers

1. Shoot From Different Angles

Taken from same height as flower

There’s a big difference between shooting down on top of flowers and shooting at the same level as a flower. Shooting at same level as a flower, means you might have to get down on your hands and knees but, it gives a more interesting less conventional perspective.

red
Same Flower from standard above position

2. For close ups Shoot with smallest aperture your lens will allow

If you have a f/5.6 lens use f5.6

3. Try Macro Lens for really close shoot up.

A macro lens allows you to get exceptional close up shots. A macro lens has such shallow depth of field that when a photographing a flower, some petals at back can even be out of focus.

4.Good Quality Tripod

A good quality tripod enables the sharpest picture, it also enables you to use smaller apertures and a longer exposure time.

5. Other Tips to Reduce Camera Shake.

  • If taking a tripod is difficult, try a monopod.
  • Remote shot taker. When pressing button, the camera moves causes some camera shake. An external button release enables you to take a shot without moving camera.
  • For important shots try multiple shot, which automatically takes several shots. At least one will be in super sharp focus.
  • Very useful is this mini tripod. It supports weight of heavy SLR, but can be folded up into a small bag.

6. Canon Filter

A Canon close-up 500D lens can be fitted to a telephoto zoom lens and is like a traditional lens filter easy to carry around and gives a cheaper way to get macro shots.


7. Best Time To Take Flower Shots

On Cloudy Overcast days. When sun is very bright, flowers can appear washed out. On cloudy overcast days, flower colour can appear more vibrant.

Spring Flowers

8. The Rain Effect

After Rain. Drops of rain on flowers add an extra romance and beauty to flower photos (see Rose top). If it rarely rains – just take a portable sprayer to add your own water – no-one will know you sprayed it!

9. Use Backgrounds for constant Colour.

Daffodil

Daffodil

A solid background helps avoid distracting backgrounds. Black often works very well, especially for white, light coloured flowers.

10. Wind

Trying to hold stem of flower can work. If you have an SLR set a high shutter speed 1/ 125 will help capture and freeze any blowing wind.

11. Use Macro Flash

Orchid

Indoor Orchid

This orchid and daffodil (black background) was taken with a macro flash
There is much more light so you can use a high f number – small aperture, big depth of field. You can get some very nice results with this. Another bonus is you don’t really need a tripod, there is so much light, you need a very fast shutter speed (1/200)

photos – Tejvan

12. Depth of Field
Crocus Flowers
Don’t limit yourself to close ups of flowers. Also try take flowers, in context. For this you really need a big depth of field (high f setting). This allows less light, so you need a longer shutter speed (perhaps half a second) to compensate. Therefore, a tripod is essential. However, it enables you to capture a field of flowers and just a small number.

Related

Garden Design Styles

Garden Design Styles

Harewood Himalayan Garden

Garden design is influenced by Location, Objectives and Resources. No two people would design the same garden for the same space nor would that garden grow and develop in the same manner.

My Top Ten Garden Styles

  1. Cottage garden
  2. Wild or Environmentally friendly garden
  3. Walled or Victorian garden
  4. Family and traditional garden
  5. Fruit and Vegetable plot
  6. Alpine, crevise or Rock garden
  7. National gardens, Italian, Japanese, Himalayan, Swiss, Spanish, New Zealand or Mediterranean
  8. Sculpture garden
  9. The Peace garden
  10. Water garden

There are so many gardens that could be designed that a top 10 list is subjective in the extreme.

    A woodland garden came very close to inclusion and is a natural feature that many want to cultivate.
    I could have selected a ‘garden of rooms’ but that is more of a technique used in many of the above types of garden.
    Specialist plantings like Rose gardens or Herbaceous gardens could have had there own spot but I had to finish somewhere.
    Public and Open gardens can have a special charm.

Let us know what your personal favourite garden is or would be.
Also let us know what type of garden you detest. For me it is a ‘car park garden’ with all or mainly hard standing for numerous vehicles and no greenery.

Todays Top Ten Tips

Todays Top Ten Tips

September 6th 2011

  1. Despite the grey overcast skies of the last few weeks there has been very little rain and the soil is dry. Water where needed, particularly the Rhododendrons that are currently filling out their the buds for next years flowers.
  2. It is not too late to deadhead your Pelargoniums ( many people call them Geraniums). They will flower until the first frost or when the daylight fails them.
  3. Pick your ripe tomatoes and strip off any remaining leaves so what little sun we get can ripen off the remainder.
  4. Order your seeds for next year. You can sow many hardy annuals, biennials and broad beans for a quick start next spring.
  5. Turn your compost to get air into the pile of summer grass cuttings and mixed waste. This reheats the rotting process.
  6. Shred or chop twiggy waste and old stems as you put them on to your compost heap to help them rot down.
  7. Tie in Raspberry canes, climbing rose stems and any growth that you think may be damaged by high winds.
  8. Clean the greenhouse glass to maximise the light.
  9. Tidy dead leaves and garden detritus that may harbor pests and diseases.
  10. Give house plants maximum light and continue with a week feed.

September Crab Apple John Downie
crab apple

How To Take Cuttings for Big Shrubs

How To Take Cuttings for Big Shrubs

Forget 6 inch cuttings, for bigger shrubs use bigger cuttings. Giant cuttings of 18-36 inches may be worthwhile on the following:- Cistus, Euonymous, Hebe, Leycesteria, Weigelia, Pyracantha or Kerria japonica. I have a friend who excels with Roses taken this way.
Also read Gardeners tips Taking cuttings for beginners

Proceedure for Cuttings

  • Water the host plant well the evening before taking cuttings.
  • Take cutting early in the day, keep out of the sun and spray with water to minimise wilting.
  • Select a shoot with plenty of new growth. Cut it off cleanly at the base where it comes from a branch or cut below a swelling leaf node instead.
  • Remove any flowers, lower leaves and soft tips by pinching out
  • If the cutting has a woody bark remove a sliver an inch long to aid rooting.
  • Have available one litre pots full of a free draining mix of grit and multipurpose compost.
  • Dip the end of the cutting in fresh hormone rooting compound, such as Murphy’s, plant and water in
  • Place in a humid environment eg. a plastic bag over the pot supported by canes, so leaves don’t touch the sides, and tied with a rubber band.
  • Keep in a shady spot removing dead leaves regularly.
  • In about 5-6 weeks, when rooted, acclimatise to outside conditions and overwinter in a sheltered spot
  • Plant out in March

Climber Cutting Tips

Read More Read More

Plant Pots that Push the Boat Out

Plant Pots that Push the Boat Out

Scarborough

If bunches of flowers can be arranged in a wide variety of containers and vases why not growing plants.

I liked this boat on a wall at Scarborough which was cheerfully full of Pansies. The variegated Ivy provided a bit of light green colour and texture and even the plastic sunflower was not out of place.

Tips for Unusual Plant Holders

  • If you make a creative container ensure there is drainage so plants do not drown. I guess these boats were holed below the plimsoll line!
  • Containers under the eaves of houses or in a rain shadow from the wall will need watering more frequently.
  • Ensure the container can hold enough compost or soil for a good root run.
  • Use water retaining gel or special container compost.
  • Pick of dead flowerheads to encourage new blooms.


This boat was in a park at Ross on Wye and it would be hard to tend the plants in the middle as the boat was quite large. It creates a whole new mean to houseboat as this is a real gardenboat.


Read Collecting Containers and Growing Veg in containers

Glasshouse and Greenhouse Preparation

Glasshouse and Greenhouse Preparation

Octagonal cloche

Get the best gardening results from your glass in a cold frame, greenhouse or glasshouse. (The difference I am told is that a glasshouse has controlled conditions).

Preparation  for 2011

  • Make some glasshouse resolutions and stick to them. What will be grown and when. What experiments may be worth trying etc.
  • Plants need light so clean the glass thoroughly inside and out.
  • Take down any bubble wrap insulation and clean with Jeyes fluid. Replace damaged sections before reinstalling.
  • Clean out  guttering and algae from cracks between the glass. A plastic plant label may help you get into tight spaces.
  • Clean and disinfect all surfaces, benches, gravel and capillary matting.
  • Wash any pots taking care to get rid of bugs lurking under rims and on bottoms.
  • Treat wood frames with a wood preservative.
  • Check windows for damage or loose panes.
  • Ventilate well and allow the area to dry
  • Replace any soil or compost according to your resolutions above

Do not forget to clean other equipment like temporary plastic structures, cold frames and cloches.
104