Hellebores and I

Hellebores and I

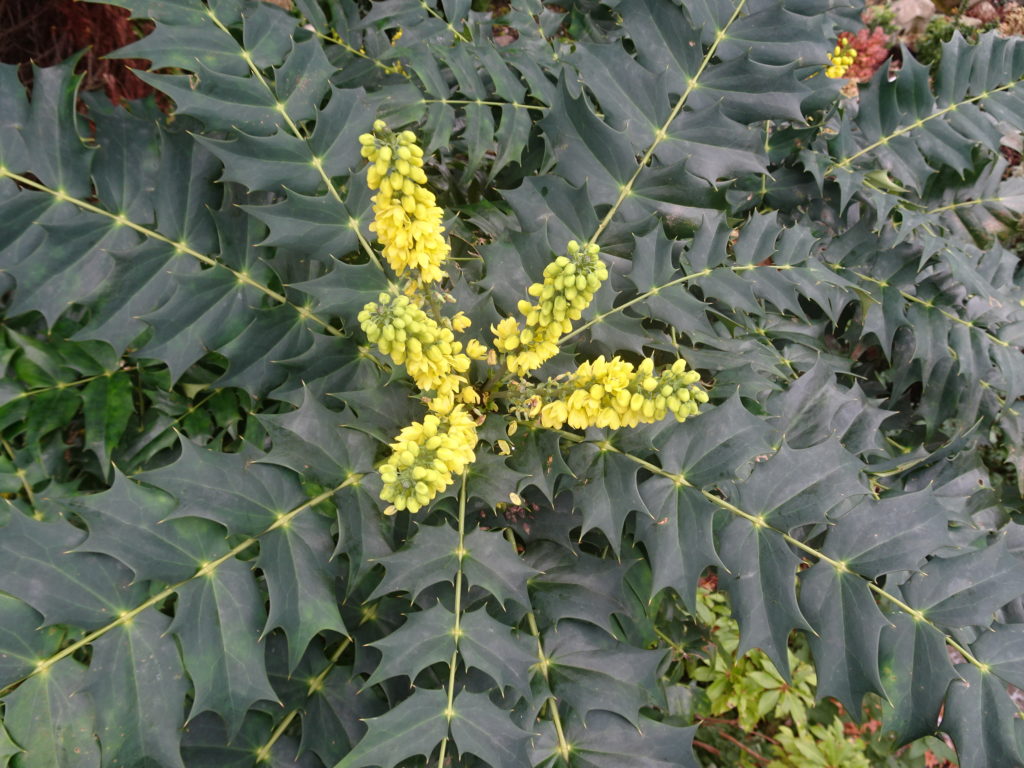
I used to think the stinking hellebore was the main hellebore plant. It has its place but on the compost heap. The Christmas rose on the other hand is a fine plant well worth cultivating. (Hellebore foetidus is a compact, evergreen perennial with finely divided elegant foliage and green flowers.)
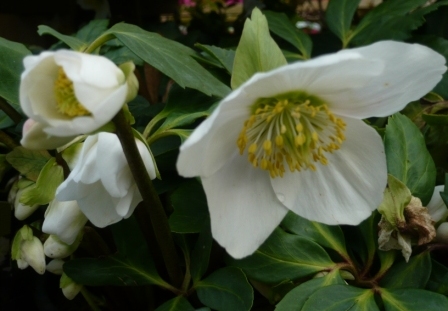
The better loved Hellebore niger or the Christmas Rose or Lenten roses produce the white flowers similar to those shown below.

Springing in to Action

I will be cutting out the old leaves of the colourful hybrids and the Christmas rose. why?

  1. The flower stems will grow before the new seasons leaf to reveal flowers so that I can see them,
  2. It exposes blooms so insects can pollinate them more easily
  3. To reduce places for bud eating rodents to hide
  4. And reduces infection from leaf spot carried over from year to year

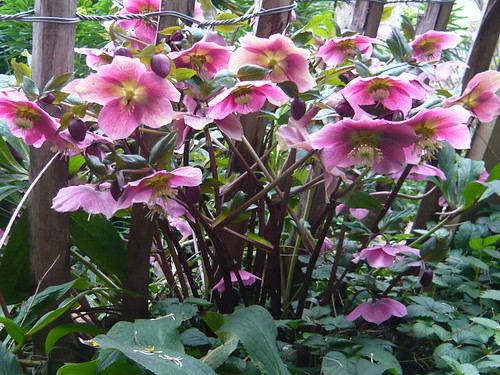
Below is a hybrid Hellebore spotted in York Minster grounds last year.

Heleborus

What the experts say

‘Hellebore viridis is native to the British Isles with two subspecies, viridis and occidentalis. They both have twelve to twenty leaf divisions and usually have dark green flowers. Hellebore X hybridus has three subspecies – orientalis which has creamy-white flowers, abchasicus with reddish-pink flowers and guttatus with spotted flowers’. Broadview Gardens holder of the National Collection of Hellebores

Seed sowing  tips from Christopher Lloyd; Seeds fall from flower capsules in May or June and germinate the following winter. Collect and sow straight away on the surface of John Innes seed compost. As soon as they germinate move to a cold greenhouse and prick out when the first true leaf appears. Hellebores orientalis, foetidus and argutiflora are prolific self sowers and I often find good self sown plants under the leave that I clear away in the trim .

Book Cover

Book Cover

Gardening with Hellebores

Lifting Your Tree & Shrubs Crown

Lifting Your Tree & Shrubs Crown

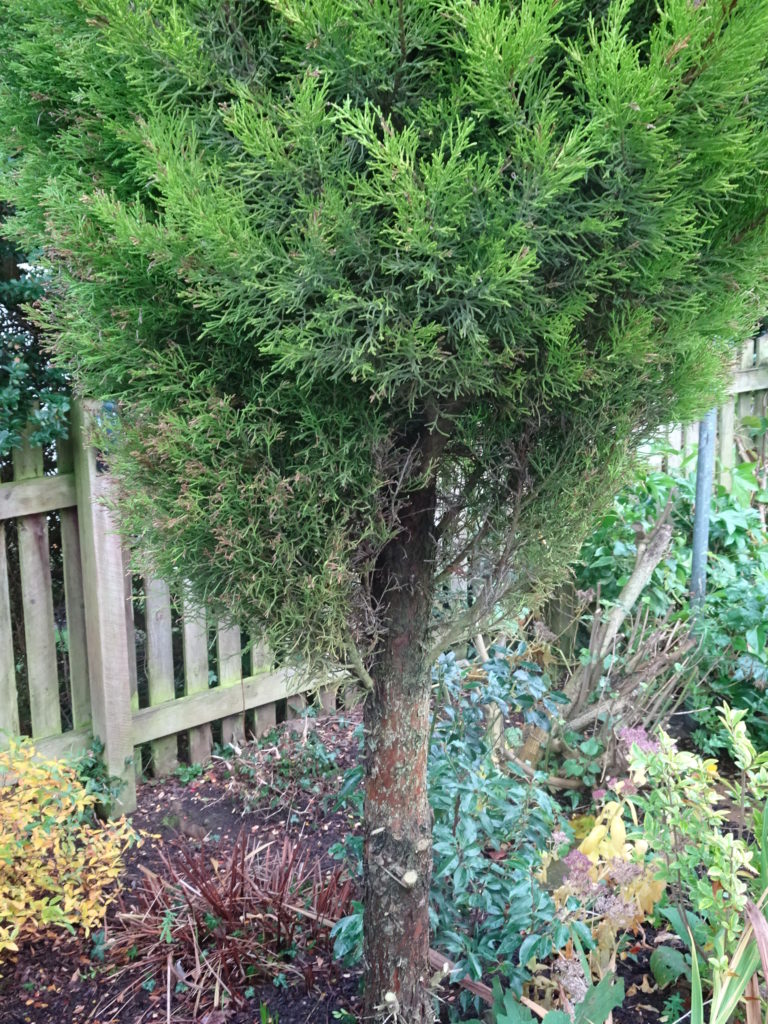
Giving trees what I call the ‘Royal Chop’ is not as drastic as it sounds. It is one way of controlling the low growing branches that restrict light, create unwanted shade  and generally get in the way. The technical term may be to ‘Lift the Crown’ which has the result of leaving the lower trunk clear of branches and letting the growth starting at an acceptable height.

My problems  started when I couldn’t reach the upper part of the conifer to keep it in trim. The same energy is going into the trees growth without an outlet at the lower end so it gets a bit wider and a lot taller. I pruned out the lower branches leaving about one third of the trunk height bare.

Had I taken out the growing point at the top of the tree the spread of lower branches would have been far wider and been the opposite of what I wanted. Conifers trimmed in spring were not the best subject to learn, on broad-leafed trees trimmed in autumn or winter may have worked better.

What the Experts Say

‘Crown lifting is the removal of the lowest branches to a specified height and where possible should be achieved by removal of smaller branches so to minimise stress to the tree. The crown of the tree should not be lifted to a point which is more than 1/3 of the overall tree height (i.e. leaving 2/3 of the trees height as crown).’ Crown thinning and crown reduction are variations that are also  designed to change the extent of the canopy.  Nick Organ Tree maintenance

‘Crown lifting on older, mature trees should be restricted to secondary branches to minimise stress and reduce recovery time. It is possible to crown lift a tree too much. Chaffin Tree Surgery

Shrubs Suitable for Crown Lifting
Acer palmatum and Acer japonica
Bamboos, such as Phyllostachys
Conifers, such as Chamaecyparis, Juniper, Pine and Yew
Cotoneaster
Euonymus japonica
Ligustrum (Privet)
Pittosporum tenuifolium
Prunus laurocerasus (Cherry laurel)
Rhododendron and azalea

http://www.amateurgardening.com 2012

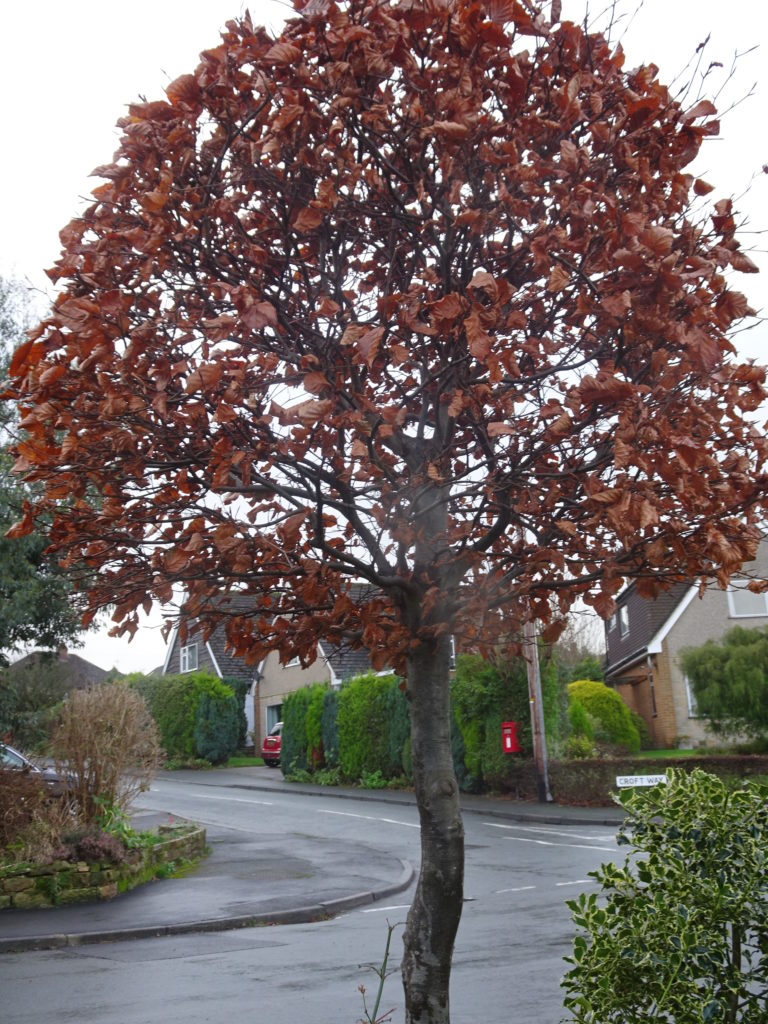
This is my Copper Beech that has been lollipoped over a few years, in fact it is regularly licked into shape.

Fastia Japonica

Fastia Japonica

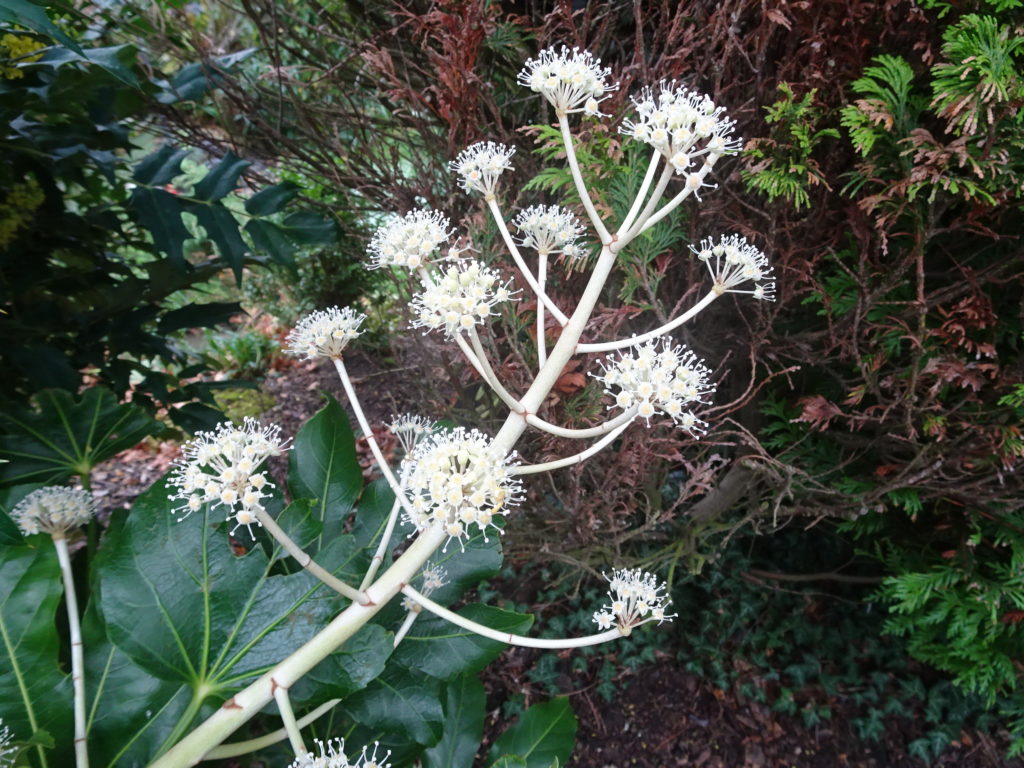
My Fastia Japonica is coming into full winter flower after a summer of evergreen leaves that provide interest and structure in the border. For short while the plant was treated as an indoor decoration but it has not looked back after it was planted out 2 years ago.
The white pompom flowers are rich in nectar providing food for the few flying insects that are around during winter. They stand out against the dark green leaves. It is strange that a tropical style plant with large hand shaped leaves should flower so well late in our season.
When the growth has been lush I have to occasionally give it a prune. I try not to cut individual leaves.

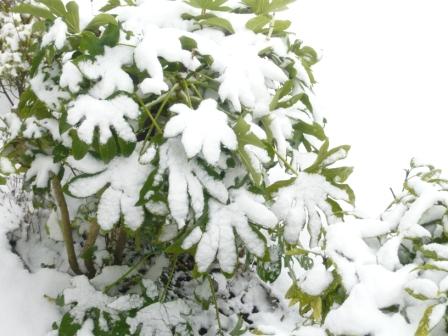
After a December blast of snow I have a garden of snow-fingers where the Fastia was growing. In the past I haven’t suffered too badly from browned of leaves.


What the Experts Say

‘Fatsia japonica is too often seen only as a bright-foliage indoor plant. As such, it does well – it is trouble free, shiny and static, the mainstay of many an artificial-looking foyer display. Fatsia japonica comes into its own outside, where the leaves darken and weather to an thicker texture.’ Helen Yemm Daily Telegraph 2013

‘Fatsia japonica Spider’s Web’ is a bushy, evergreen shrub growing to 2m tall. The dark-green leaves are heavily-speckled with white, particularly at the edges, but the white variegation can sometimes spread across the whole leaf.’ RHS

‘Japanese aralia is a tropical plant that makes a bold statement in the garden, in outdoor containers or as a houseplant. The common names Japanese aralia plant and Japanese fatsia refer to the same broadleaf evergreen, known botanically as Aralia japonica or Fatsia japonica.’  Jackie Caroll Gardening Know How
Eucalyptus Adventures

Eucalyptus Adventures

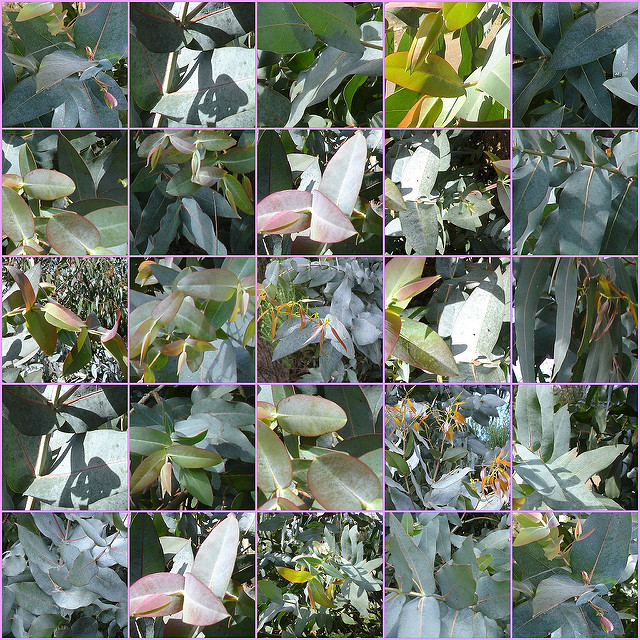
Yes you can grow Eucalyptus in the North of England although the mosaic below was created largely from Australian leaves by Robyn Jay.

Attribution-NonCommercial-ShareAlike 2.0 Generic (CC BY-NC-SA 2.0) on flicr

My Adventures

It is about 12 years ago that I planted a small pot grown Eucalyptus near a wall in my garden (the wall may be the first mistake and the crazy paving path would be my second). For the first few years or so the shrub sized tree did quite well and provided an exotic feel and aromatic leaves without problems. As the growth exceeded 10% every year the Eucalyptus began to out pace itself growing in girth as well as height. At 30 feet high another 3 plus feet for every subsequent year became daunting. Eucalyptus are tall growing trees in their natural habitat (300 feet +) which aint an English urban garden. At the same time the crazy paving became too crazy with the roots of the Australian ‘mountain ash‘ or Eucalyptus. Thus the decision was taken it had to go.

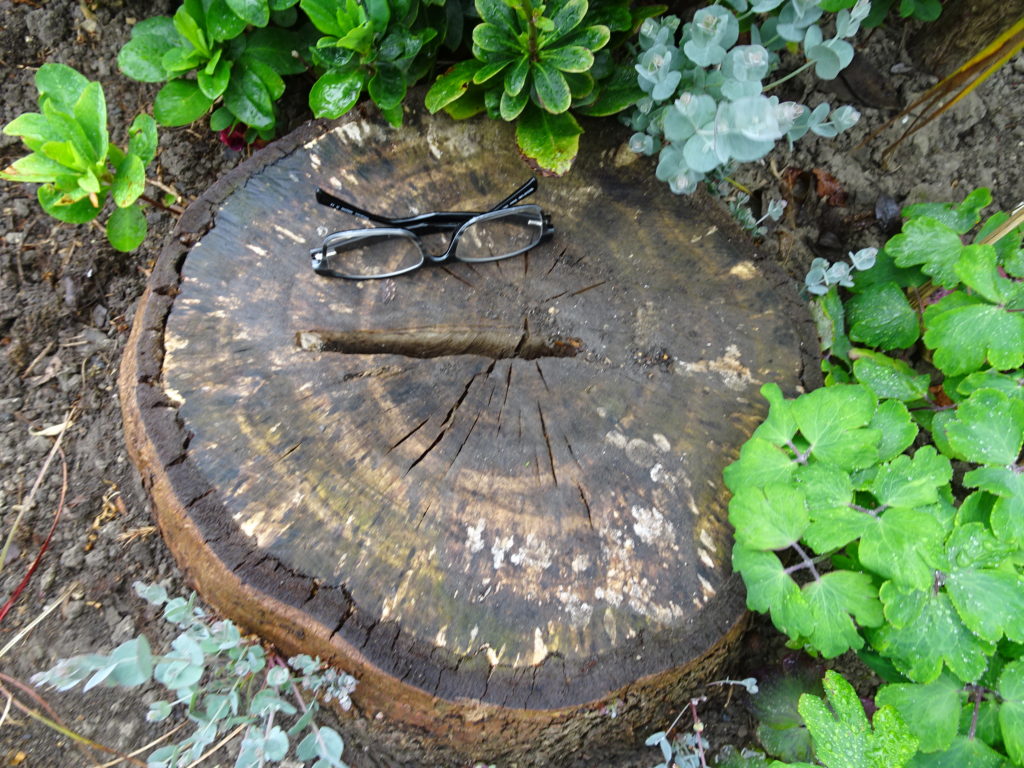
As luck would have it a tree surgeon was working 20 gardens away and I hoped to get a quick, cheap job ( there is no such thing). I told the guys to take down the Eucalyptus tree on the corner of my street little realising the neighbor on the other corner also had a tall Eucalyptus in need of lopping. How could I miss such a prominent plant. Fortunately I was asked to pay beforehand and the neighbors tree was saved for another day. Due to potential damage to the wall and path I was happy to leave the stump in the ground; big mistake. You can see why with the little blue shoots starting to grow despite the treated stump with a slit for poison.

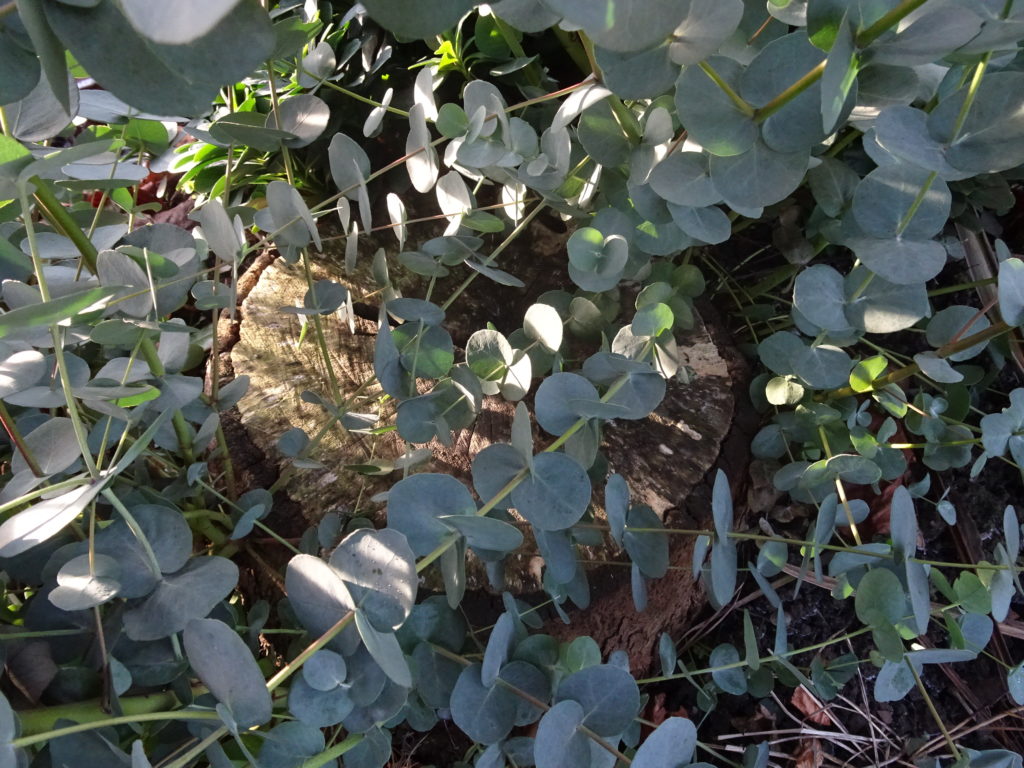
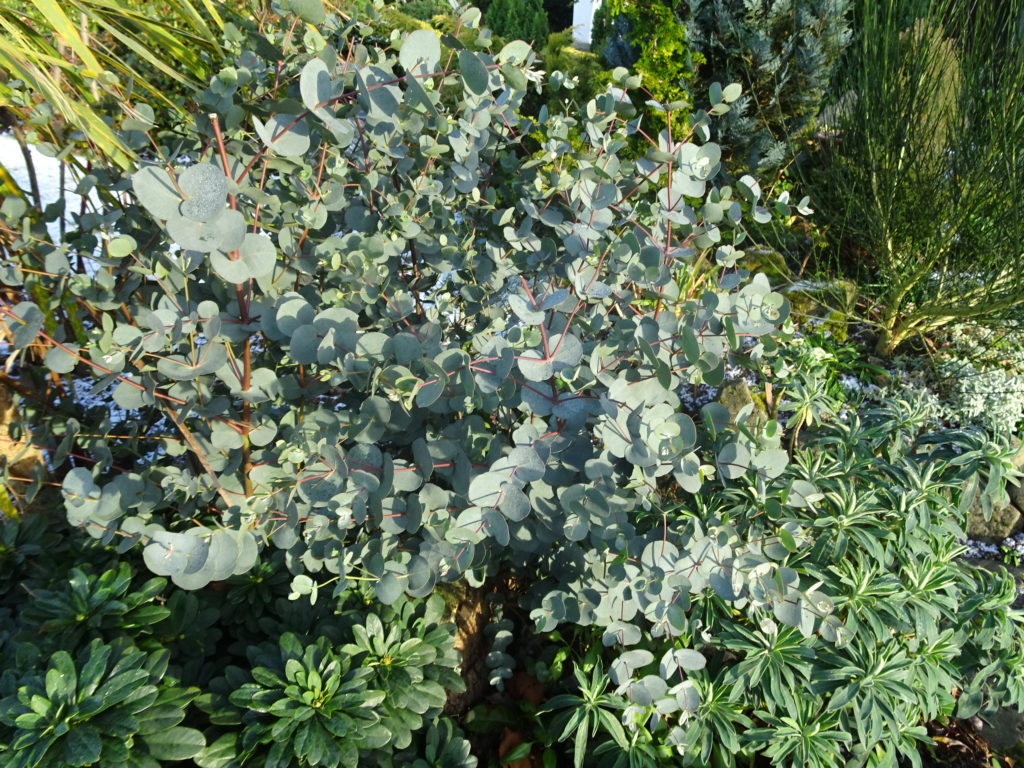
A few months later and far from starting to rot down an 18″ mass of side shoots has sprung from the old trunk. My wife has come to the rescue of my back, the wall and I suppose part of the path by proclaiming the Eucalyptus looks better than it has ever done and should now be reprieved. As long as we cut the shoots out for floral displays and never let the plant get out of hand again It can stay. Meanwhile the neighbor’s tree is 30feet high and growing.

If you play Dancing Queen or Money Money Money on a didgeridoo is it aboriginal.(Arboriginal or abbariginal)

Outdoor Pots and Wotnot

Outdoor Pots and Wotnot

Experience with Outdoor Plant Pots

This back end I have bought some new terracotta pots from the manufacturer in their end of season sale. I had always wanted some large, matching Long Toms and I now have some filled with patio roses. (Naylor Garden Pots is near Barnsley since the 1890’s.) I have also belatedly realised that pots look better when grouped in identical pairs or with like minded pots.

The new pots were commandeered by two of my adult children leaving me with only a couple of Long Toms.

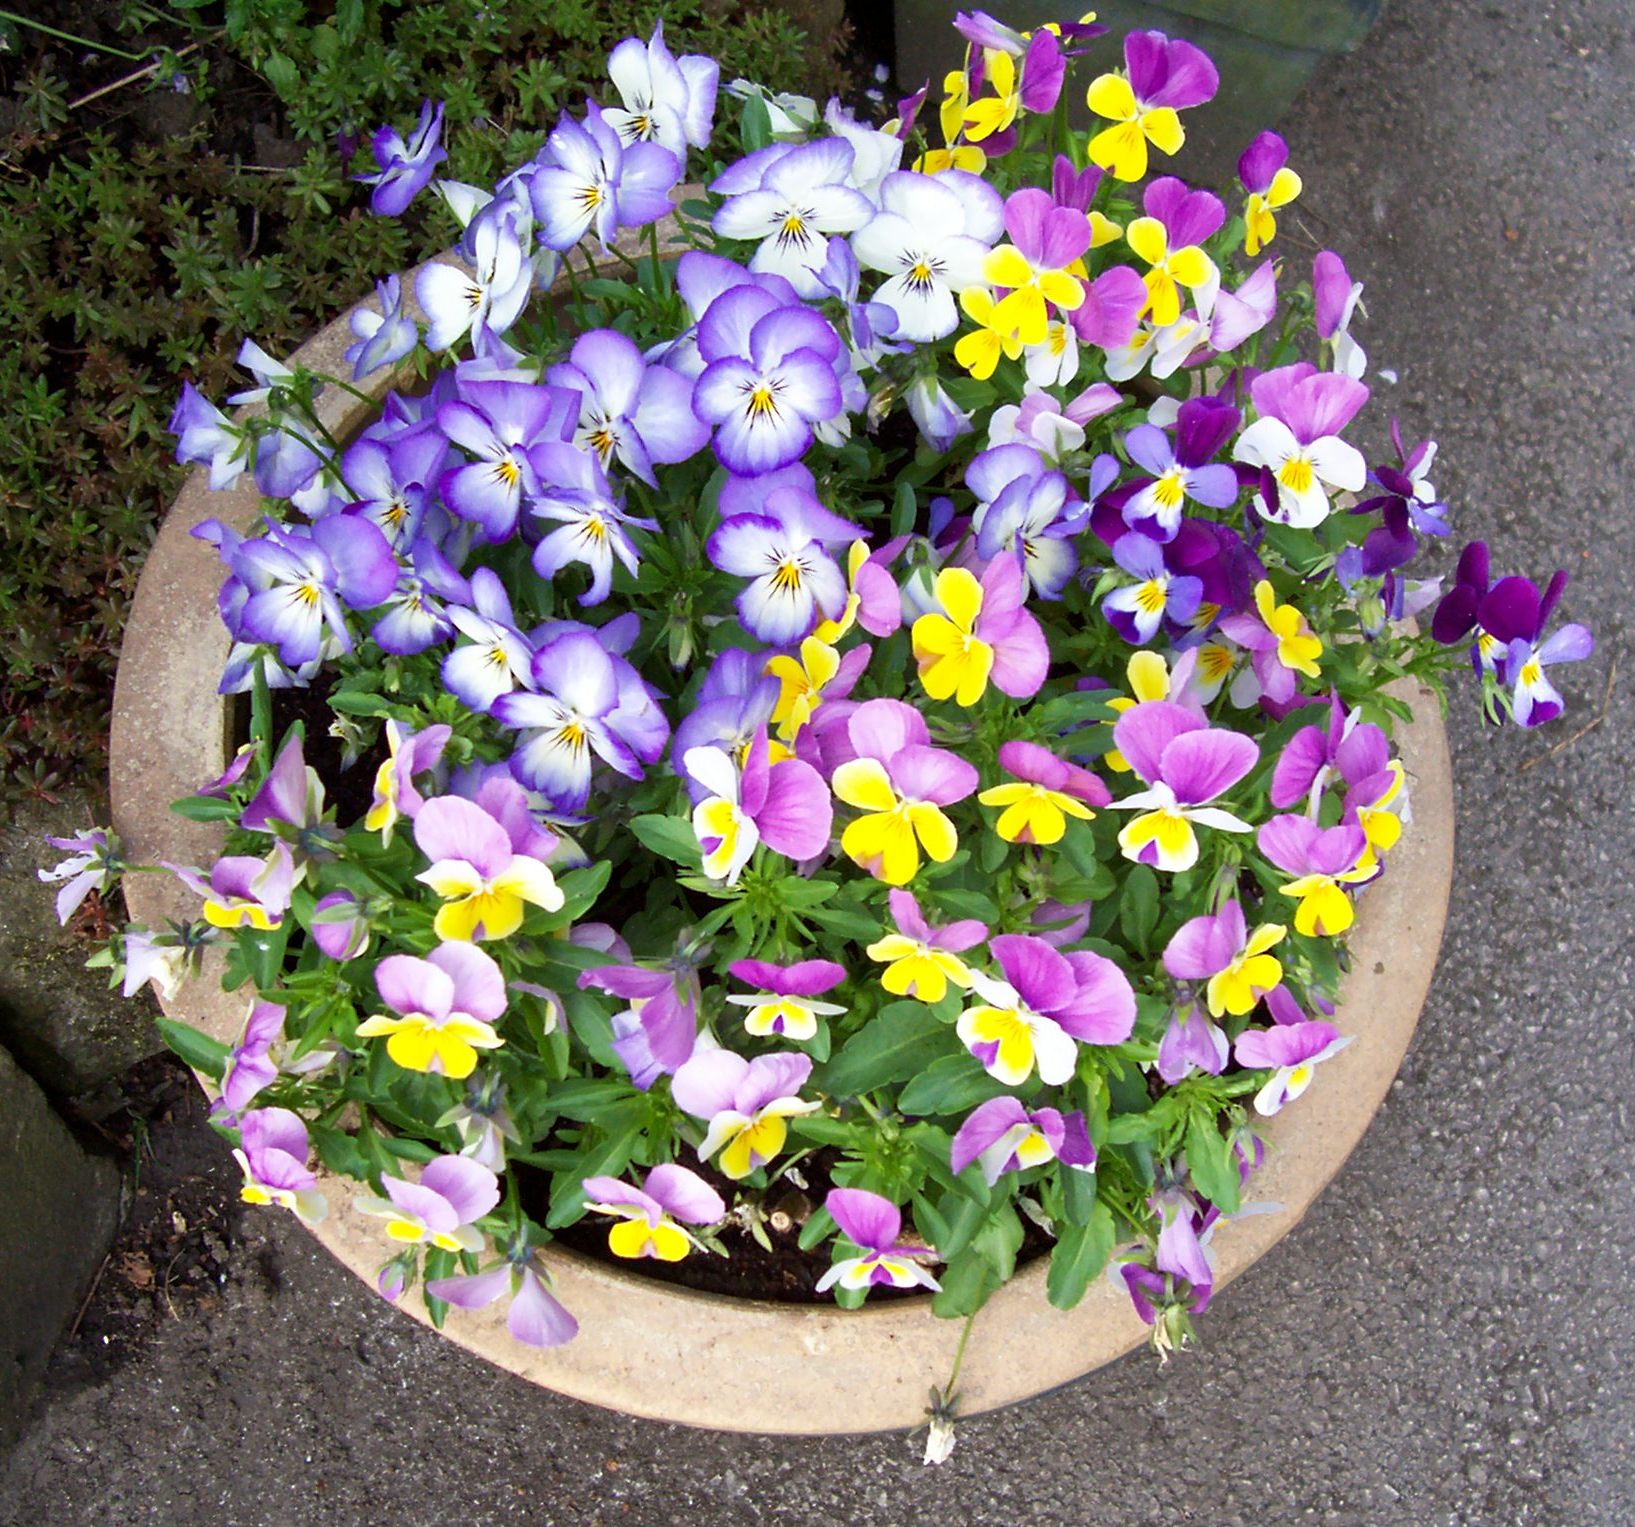
A sturdy pot on tarmac hard standing with cheerful violas. New plants will be planted up in the same pots when these plants go over. The Violas transplanted quite well into my garden but Pansies from pots seldom do as well when replanted.

Winter Care

Glazed and ceramic pots can be damaged by frost. Terracotta pots may be sold as frost proof but if you have spent a lot of money on them it is as well to take care.

Full pots present a different problem as damp freezing soil expands as it cools enough to split or crack thin pots. I move mine to a sheltered spot under the eaves of the house. I raise pots off the ground to stop them freezing to the soil and loosing the bottom of the pot. It also helps improve drainage. Although ‘pot feet’ can be bought for the purpose I am using old plastic tape cassette boxes this year (this may be false economy but I am Yorkshire tight.) Bubble wrap or hessian can be used to insulate precious pots and keep roots from the worst of the frost.

Any pot not in use should be washed out in Jeys fluid or similar disinfectant and I store them in the garage, shed or coal place through winter.

I get frustrated at myself if I let pots get top heavy so wind blows them over  or bad location say in a wind tunnel. A have taken to crocking big pots with heavy stone and gravel to give a ‘sold Bottom’ to the plant pots.

Problems and my Help with Plant Pots

  1. Heavy pots  are hard to move and lift without casters, wheels or sack trolley. (often 50% of the weight is water.)
  2. Soak terracotta pots before use to prevent them from drawing moisture from the compost into the pot. This moisture is important for evaporation that keeps plants and soil cool.
  3. Black plastic gets hot and compost dries and shrinks around the edge. Keep shaded or know what type of plants will not mind extremes.
  4. Thin plastic may look unnatural and will not age by moss or lichen. Consider using a plastic pot inside a good looking pot so you can easily ring the changes. Plastic also becomes brittle when exposed to UV light.
  5. Beware the dreaded Vine Weevil which can consume your plant roots. It is the grubs that do the damage but the beetle look terrifying.
  6. It is worth the extra cost to buy frost free pots if you want to leave them outdoors in a frost prone area.
  7. Gardeners tips
pH Testing – Don’t Bother – Apply Commonsense

pH Testing – Don’t Bother – Apply Commonsense

I love my acid loving Rhododendrons, Azaleas and many other ericaeous plants. So no wonder I have a ‘kit’ to test my soil for the level of alkalinity or acidity. Having said that I think it is a waste of time and money in the majority of cases. I now try to use commonsense instead.

Prized plants get appropriate compost and dare I say it ‘Peat treats’. Peat goes in any planting hole and is worked in around as a mulch. Feed and fertiliser is often chosen because it has been formulated for ericaeous plants. The acidity of the soil is not a fertilizer in itself but is a conduit that allows the plant to use what food is available too much lime locks food into the soil and plants will suffer.

I try to avoid making matters worse so no lime in the garden where my best Rhodos live. Blueberries are failing in my Fruitery because they can’t get nutrient out of the soil. So it is my intention to pot them up into good pots with better ericaeous compost.

I spread some lime on the area where I will be growing brassicas as they perform much better in a slightly alkaline soil.

Notes on pH

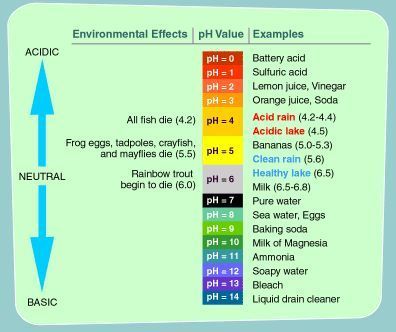
pH soil levels start from 1 to 14 from pure acid to pure alkali. Normal levels for soil are around 6.4 to 7.1. More acidic soil would be 5.3 to 6.5. Alkaline soil would be from 7.2 to 7.6.

Soil can leach out the soluble acids or alkalies to move to neutral conditions unless the surrounding geological conditions dictate.

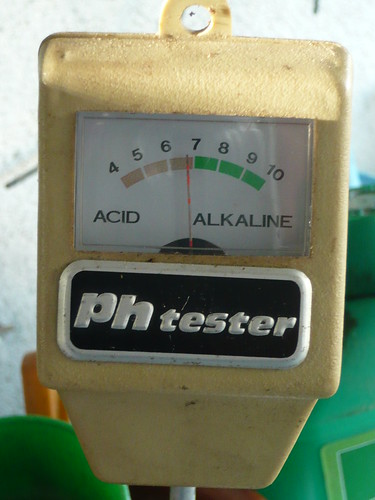
If you still intend pH testing you can buy chemical tests or a meter similar to that below


Ph tester

Gardeners tips for correcting pH

My Soil Projects

My Soil Projects

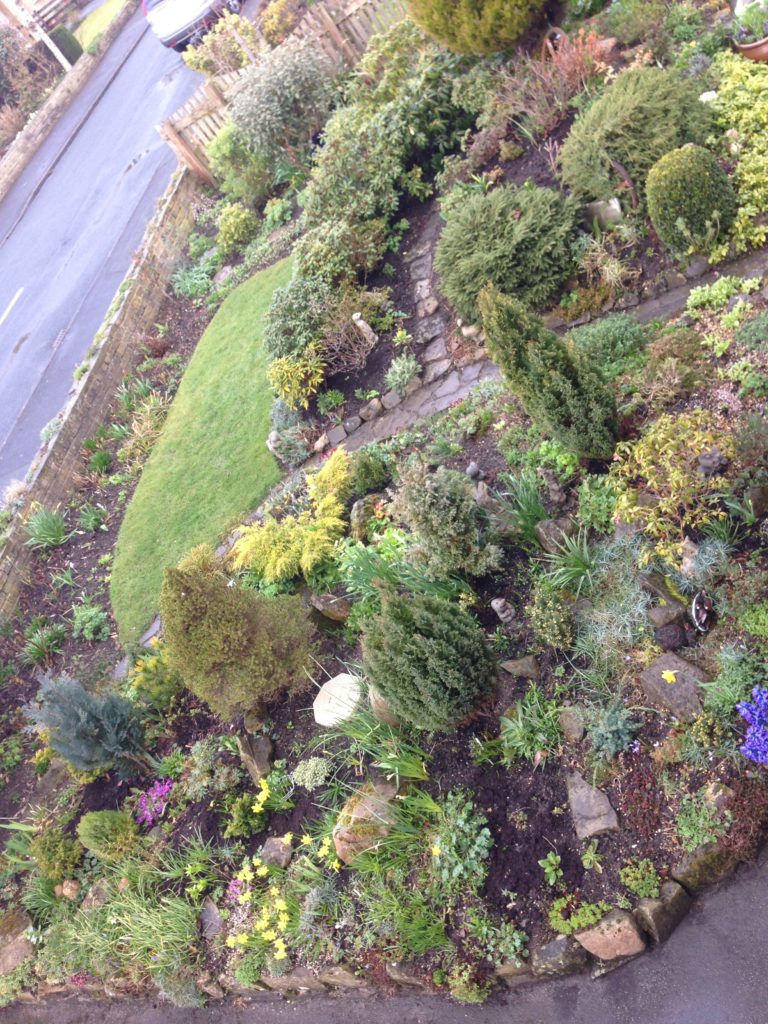
I have had the same garden for 35 years and most of the soil has remained ungardened and untouched. I say that because the sub soil is best left undisturbed and I am not a fan of double digging (ie 2 spits deep). Underneath the lawns the soil is left untended and almost half the garden was and still is down to grass. We  are probably all guilty of doing little to improve that soil under lawns unless we are laying turves or new seed.

Manure Fables

I don’t think it is a false memory when I think of my father going out with a bucket and shovel after the rag & bone man’s horse to collect a deposit. Dads rhubarb and soft fruit were the post war beneficiaries.

For many years I went to a local stables for bag it yourself horse manure. My son helped me until he grew up but I never did grow up that is. He encouraged me to get the hot stuff from the new part of the not inconsiderable pile left by 30 riding school horses. This was intended to activate my own garden compost heap and help improve my own composted output. Mainly it just activated the nostrils. I on the other hand aimed at the bottom of the pile for the oldest and theoretically the best rotted stuff that helpfully could be cut in slices like peat in shape but not texture. This I wanted to use on roses, runner beans and for general garden use. I collected many bricks and stones, a bad back and a wonky car suspension system. The garden collected the unrotted weed seeds to germinate where and when they wanted. To be fair the old stuff was OK weed wise but fairly solid in structure.

Without my willing labourer, now off at university, I ordered and took delivery of a lorry load of ‘well rotted manure – honest Guv’ stable manure. It arrived on a farm trailer that couldn’t tip over a convenient low wall so it had to be slid onto my drive.  Clearing and barrowing it a fair distance was almost as hard as if I had collected it myself in many large, old, plastic peat sacks. The straw bedding was still much in evidence and rotting was negligible. One garden bed recieved the manure as was and this contained too many black slugs and I will revert to collecting my own ‘orse muck in smaller quantities now I have 3 large compost bins on the go.

Getting The Hump

In another project to create a new bed on top of an old drive became known as ‘the Hump’.  I couldn’t dig out the tarmac drive & hardcore so I ordered lorry loads of soil. It created a pile that was 4 feet high and covered 6 yards by 4 with steepish slopes. It was fertile judging by the number of potatoes that grew in the first year. Perhaps it had been scavenged from a spud farm and in addition to old seed spuds the soil was heavy clay probably subsoil (may be it hadn’t been good enough to grow commercial potatoes). There were virtually no stones (that may have helped drainage) but the soil is very absorbent. Even after 10 years and lots of the aforementioned manure there is no tilth of any note. Nevertheless one third of this ‘hump’ has been a success due to copious amounts of peat to create soil fit for Rhododendrons.

The ground has settled and the pile is a bit lower and more evenly spread. Many early plants have now grown over the original path. The tarmac base has never been uncovered but the dwarf conifers have been maintained at bonsai size without my input.

I now know that ‘top soil’ to be really top notch it needs to be bought carefully and not in bulk. Nor should it be from a construction site with bits of rubble, weeds, roots and contaminants. Manufactured or blended soil is often used by landscapers for quality and consistency.

Look after the soil you have

  1. Worry more about the structure of the soil than adding chemistry. If the soil is able to hold moisture and air it should be good for worms and for growing.
  2. If a fine tilth is the top layer of soil and the base is subsoil the best rooting zone will be in between
  3. Fork over compacted borders; turn over the surface soil and mix in humus such as, green waste, old compost from pots, bags of peat, mushroom compost, green waste. When forking over taking care of spring bulbs.
  4. Top up around plants by spreading a thick layer of compost.
  5. This final layer of humus will help worms to drag compost down into the soil to improve aeration, fertility and soil structure, bacteria and fungi will benefit. Worms work judging by the many worms I have in the best parts of the garden.
  6. Try not to walk on the soil in a way that compacts and squeezes the air out
  7. Don’t let top soil dry out and be blown away in high winds nor washed away by excess water.

Gardeners Tips Earlier information

Leaching and water Logging

Soil Types

Soil Health Tips

Garden Chemicals

Soil Health Chemicals

  • The health of plants and the health of soil go hand in hand. It is very hard to have one without the other.
  • Chemical assitance for soil health comes in improving the constituents of the soil by fertilisers or correcting deficiencies (as above) and by improving the structure of the soil (below).
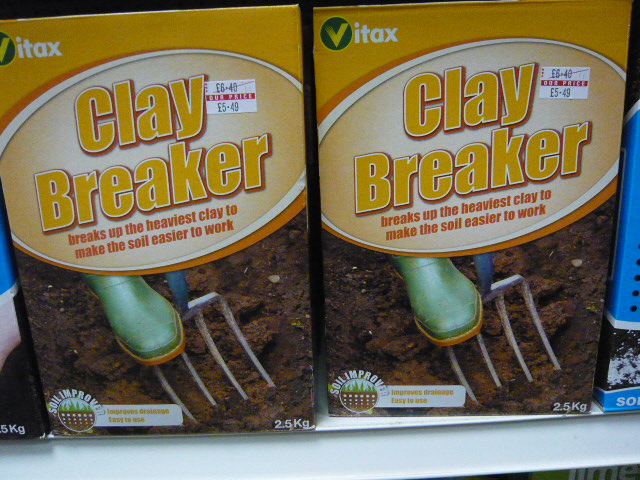
  • Clay breaker is designed to stop the very fine particles of soil sticking together in wet weather and baking rock hard in the sun. The addition of grit and humus will do a similar job.
  • Humus in the form of spent mushroom compost, peat or manure are basic garden chemical additions to improve soil condition.
  • Potting base is not added to your soil but to peat to make your own seed or potting compost. It usually contains a wetting agent, chalk and trace elements and the resulting mixture is fine for growing your own seedlings or cuttings.
  • Soil improvers like Forti8 or seaweed extract claim to add minerals and trace elements to your soil. They do not do anything for the soil consistency or structure.

Here’s to Good Health


African Violet Experience

African Violet Experience


Afre years of dipping in and out I bought 2 Saintapaulia better known as African Violets (AV) in December 2016 and managed to kill one within months. This  12 month survivor has been in flower continuously ever since.
The plant is happy in a 4″ globular ceramic pot which has a sump to water from underneath. Through my unconscious neglect the plant has to wait until the leaves start to flop before I remember to water. They quickly plump up after a drink but after the first death I have made sure the Violet does not stand in water ‘damping off’ the roots.

After a year I have discovered some old special African Violet (AV) fertiliser and as a birthday treat the survivor has been given a weak solution in the last watering. The quick draining compost contained enough goodness to last until now. I don’t think they are heavy feeders. Too much feed would make the leaves soft and prone to rot.

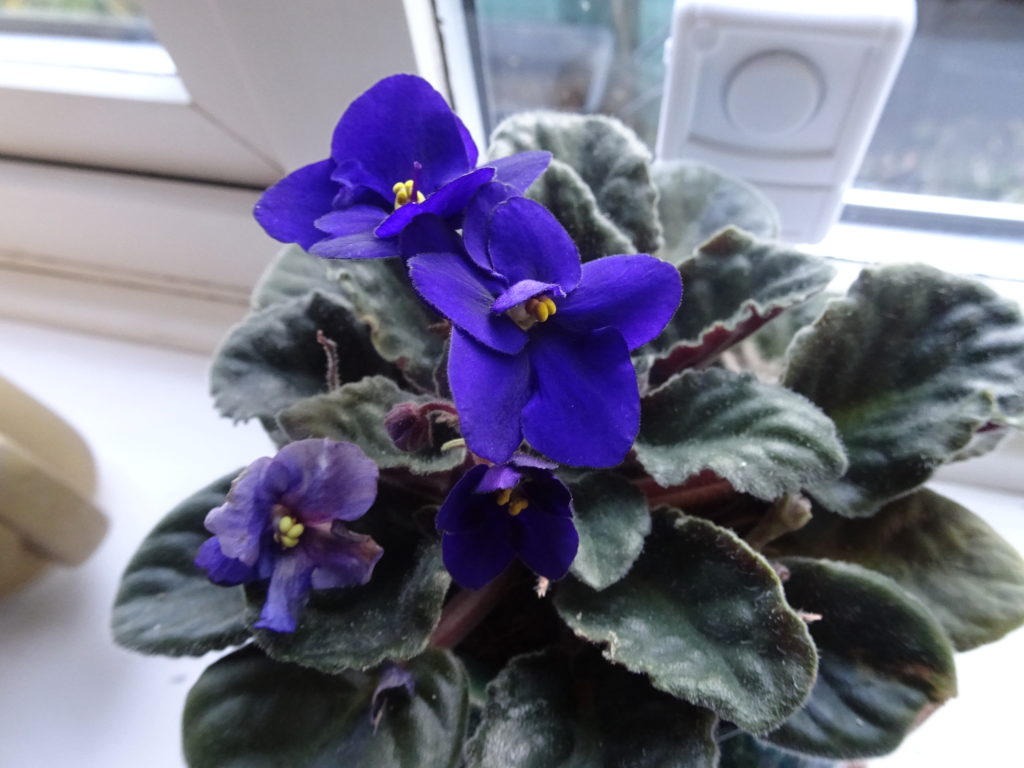
As you can see the AV is kept on a windowsill facing east and except on one exceptionally hot sunny day there has been no scorching or burning.

Dead and dying flowers should be pinched off to make room for new growth. There is one ready to go on this plant and an untidy old stem in the background. I prefer the finger and thumb pinching method rather than ‘pulling’ the offending item to keep the plant roots firmly in the compost.

This AV has soft hairy leaves and you can see the hairs on the edge of the petals below.

What The Experts Say

African Violets were discovered in German East Africa by Walter von St Paul- Illaire  after whom the six  species (and numerous sub-species) were named. They were first brought to Europe  in the 1880’s and subsequently the USA where as a subtropical species they were cultivated for indoor or greenhouse use.

Adequate light and a  temperature of 60-75 degrees are the keys to successful flowering and a long season. 50% relative humidity is an ideal but I wouldn’t stress myself if this is not always achieved.

Plants will grow well in small pots or pans  2½” -4″. Only older larger plants need a pot of up to 6″

The best plants look symmetrical with a single crown. Side shoots can be pinched out and used as cuttings. Windowsill grown plants need regular turning and dust can be washed off as long as the center crown is dried.

Seed sowingg and vegetative propagation are one of the joys of AV growing. Leaf cuttings with at least 1″ of stem should be broken off the main stem without leaving a stub. Select a stem that is not one of the oldest, flopping over the edge of the pot, nor the youngest central crown stem. Cut the end obliquely and allow to dry out for 24 hours.(I do not bother with rooting hormone). Cuttings can be rooted in water alone but I prefer potting in a mixture including peat, sand and vermiculite. Keep in warm, light,  humid conditions for up to 3 months. Side shoots, offsets and even flowered stems can be rooted as cuttings. It is possible to divide a plant with several crowns by knocking off the soil and gently pulling apart to leave a bit of root on each bit when repotting.

Special tip. AV are not prone to infestations of insects though poor husbandry may give lie to that statement. One exception is the Cyclamen mite that can move from an infected Cyclamen plant so keep the away from your AV’s.

Gardenerstips including advice on watering

Books from my Collection

African Violets Clements Tony
African Violets and related plants Wall Bill
African violets growing in the home Milsted Muriel
African Violets How to grow Rector Carolyn

Books from Amazon

Book Cover
The African Violet Handbook (Paperback) by Tony Clements

Book Cover
The African Violet The Complete Guide

Book Cover
The African Violet Handbook

I have just bought some African Violet seeds from a company called ‘SunshinebyDung’,  appropriate or what? Eventually I ordered 12 packets from China so I will wait and see what happens as they pass through import control or not as the case may be.

A Late sowing of Kale

A Late sowing of Kale

kale

Here in Oxford, we tried sowing some Kale in the middle of August.

We sowed some directly into pots and as an after thought sowed some directly into the ground.

Going on holiday for two weeks after sowing seeds is always asking for trouble, and by the time we got back they had shriveled up and were only good for the compost heap. However, the seeds sown direct into the ground did quite well. A few got eaten by slugs but a couple grew fast enough to escape their clutches.

The location in the garden wasn’t the best, with shade from Conifer and other trees limited the amount of direct sun, as Autumn progressed, they were lucky to get one hour of sun per day. Yet, despite little direct sunlight, they kept growing and soon started to encroach on each other. We started picking some leaves from the bottom of the plants and got a few meals out of them.

As the nights shortened, growth slowed down almost to a stop and the Kale pests seemed to be taking out more than they were able to grow. I think later damage came from pigeons or the like, it doesn’t look like the work of slugs – too big and neat.

Anyway, they look OK, in the mostly empty border and were a good ground-cover as we await a new fence. The last few straggly plants will be harvested and will make the odd meal or two.

But, for late sowing, they didn’t get enough sunlight to really get going – even the richest soil can’t compensate for lack of light. But, next year, we’ll pick a better spot and hope that they really take off. We may also try a later sowing because Kale is a good plant for providing fresh veg through the winter months. However, we may have to take pest control a bit more seriously which will mean netting to stop both butterflies and pigeons – so maybe not in the flower border.

Here’s a useful post on growing organic Kale.

Related posts at Gardenerstips

My Mistakes with Chrysanthemums

My Mistakes with Chrysanthemums

If a plant is worth growing it is worth growing well and this applies no more so than to Chrysanthemums. I have said recently that Chrysanthemums will repay the gardeners attention with a productive crop of flowers for the home, show bench or garden.

My Practical Mistakes

  • Plant and forget will not work very well with most Chrysanthemums, they need some TLC. For several years I under performed by plonking new plants into situe and then leaving them alone to fend for themselves.
  • Chrysanthemums growing in pots quickly become top heavy and are prone to being blow over. I lost may good stems by letting this happen. It taught me that the stems are brittle or at least prone to break where a new stem meets the main shoot.
  • Failing to understand the variety left me treating low growing ‘mums’ like large decorative varieties. A case of one size not fitting all.
  • Once you get a good bloom do not get it wet & soggy or it will rot from the head like the photograph above.
  • Neither overcrowd nor grant too much space if you want a good display.
  • I am renown for poor staking of plants including Chrysanthemums. It is worth the time and effort.
  • Strongly growing plants are capable of surviving many pests so I do not spray. This year I have had enough vases full of flowers that some critters have been brought into the house. They left droppings, pollen beetle or other dross that a timely spray would have prevented.
  • I planted several good plants in virtually neat horse manure. As it started to rot it fed the slugs and microbes not the Chrysanthemums.
  • Even if I remember to stop  Chrysanthemums in time I usually forget to pinch out excess buds to encourage fewer but better blooms.