Browsed by
Category: Tips for Growing Series

Help with growing popular and interesting flowers and plants. Simple, easy guidelines for growing good plants.

Help Growing Globe Artichokes

Help Growing Globe Artichokes

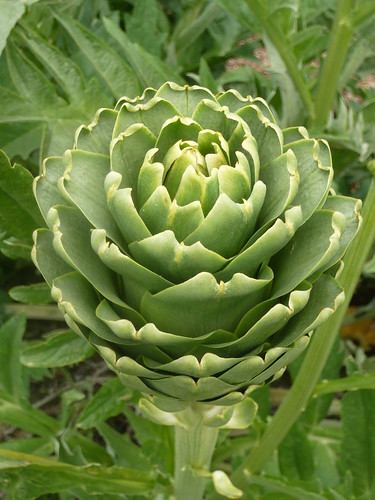
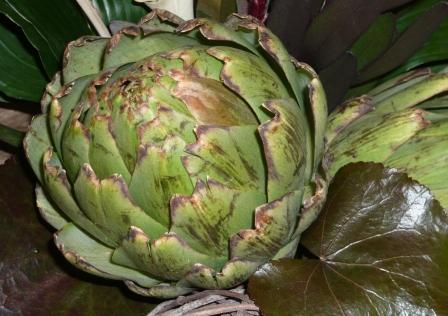
Globe Artichoke or Cynara cardunculus is a perennial thistle with an edible flower head. If you need help growing Globe Artichokes remember the plants grow 6-10 feet tall with arching, deeply cut, silvery green leaves.
Do not confuse Globe with Jerusalem Artichokes the later are root vegetables related to Sunflowers not Thistles.

Globe artichoke

Globe Artichoke Growing and Cultivation Tips

  • The globe artichoke requires a rich sandy well manured soil. It prefers a warm sunny site.
  • Seeds should be started off inside and transferred outside once the soil is warm. Alternatively sow seeds outdoors in free draining soil in mid spring when the soil has warmed up.
  • The globe should be planted in rows three feet apart with two feet between each plant.
  • After harvesting the main head, secondary heads will appear and these too can be used.
  • In cold areas, cover the plant with a mulch of straw, compost or bracken to protect it through the winter.
  • It crops in the second year after sowing.

‘Green Globe Artichoke, Concerto F! hybrid and other seeds are available from Thompson & Morgan
Globe Artichokes grown from seed can take a long time to mature and it is easier to buy ready-rooted suckers to plant in the spring.

Globe Artichokes
are architectural plants growing 5 feet tall and make big clumps of arching, jagged silvery leaves that are at home in the border or veg patch.

Artichoke
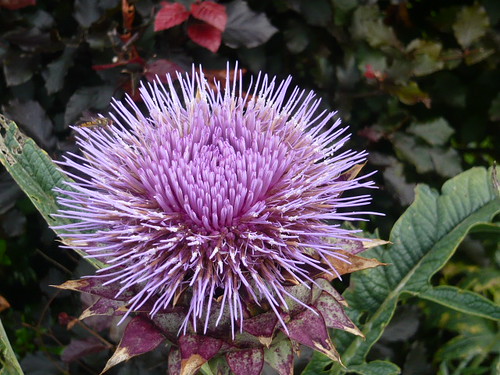
Cynara scolymus blown open

BBC Tips on Growing Globe Artichokes include
‘In the first year, plants need to put all their energy into making growth.
Remove any flowerheads as they form.
In the second year, allow the edible heads to develop for harvesting in summer.
Pick the bud at the top first, when it’s large and swollen, but before the scales have started to open. ‘

globe-artichoke

Globe Artichokes, are related to Cardoons. The thistle like plants, 2-5 feet tall, are grown for their edible flower buds. Normally raised from rooted suckers taken in spring or sown in April and transplant the following spring at least a foot apart. The delicious traditional green heads can be eaten cooked or raw.
The flowers develop in a large head from an edible bud about 3-6 inches diameter with numerous triangular scales. The individual florets are green-purple. The edible portion of the flower buds consists primarily of the fleshy lower portions of the bracts and the base, known as the “heart”. The immature flowers in the center of the bud is called the “choke”.

Though technically perennials which normally produce the edible flower only during the second and subsequent years, certain varieties of artichoke can be grown from seed as annuals. Some varieties produce a limited harvest at the end of the first growing season even in regions where the plants are not normally winter hardy. This means that home gardeners can attempt to produce a crop without the need to overwinter plants. The recently introduced seed cultivars ‘Imperial Star’, ‘Northern Star’ and ‘Green Globe’ or ‘Purple Globe’ are organic varieties.

The plants have enough character to be grown in an ornamental garden if space is limited.

Local Show Tips

Local Show Tips

Cynara cardunculus

I entered 10 classes in our village show including a vase of flowers with these Cynar cardunculus. The rules were to have a minimum of three varieties so I included some Sedum and Buddleia to give an Autumn feel to the vase. On the ‘basis of less is more’ I threw away a lot of flowers I had taken but didn’t use. I ended up with a second prize to a marvelous display of umpteen varieties in an airy display.

Local Show Tips on Time

  • Arrive for benching within the stipulated hours and remember it will take you longer than you expect. It gets just as rushed as Chelsea even for your village show.
  • Allow time for tweaking your exhibits, turning to best advantage and cleaning around your exhibit.
  • Judging will be at a set time when everyone had to leave the hall and our show opened to visitors in the afternoon.
  • Speeches, raffles and prize giving took up ‘gardening time’ towards the end of the show before the uncollected exhibits were auctioned off.

Local Show Tips – Presentation

  • Standard vases were provided for floral displays but fruit, vegetables and potted plants used your own imagination.
  • Onions were displayed on sand or rings except some giants that stood out on there own.
  • I entered 3 fruit classes and stood the apples on squares of white paper. I left the natural ‘bloom’ on the apples and came second, again, to some highly polished smaller fruit. (What to do next year?)
  • Several exhibits were mounted on doilies which probably says something about the age of our village. (Seriously with lots of classes for children there were lots of young villagers around.)
  • The best tip I have is aim for zero imperfections, a good small one will beat a big imperfect specimen.
  • Keep the exhibit clean and tidy using only black or white presentation aids.

Local Show Tip – Keep Too Schedule

  • Read the schedule if it says 5 items they do not mean 4 or 6, even if you think it looks better.
  • Make sure you are in the right class and leave the correct marker. We are give a reference ticket to leave under our exhibit so the judges do not know whose entry they are judging but can get a subsequent reference back.
  • I may have been disqualified in the french bean class when I entered flat pole beans, anyway they were nowhere near good enough.

End of the Show

  • I may not have thanked the organisers and volunteers adequately at the Menston 2011 Show so I do so now.
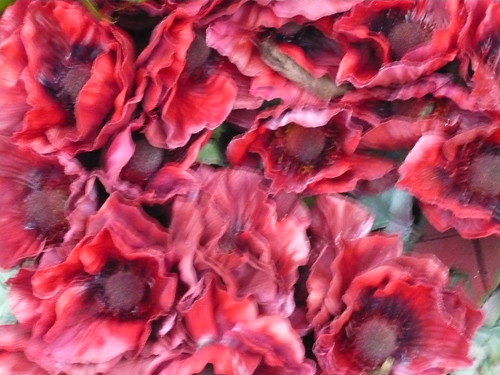
  • Our show will donate the proceeds to the Royal British Legion 90th anniversary appeal. They had a stand, bunting and poppies on display
  • Local shows are for fun and it is the taking part rather than the winning.
  • However you can get a first by being the only entry in a class or in my case by being lucky on one entry. ( not my Pelargoniums or Fuchsias unfortunately)

11.11.Poppies

Read more about Growing Show Gladioli and Show Shallots.

Check out Giant Pumpkin Growing Tips

Winter is Coming to Your Garden

Winter is Coming to Your Garden

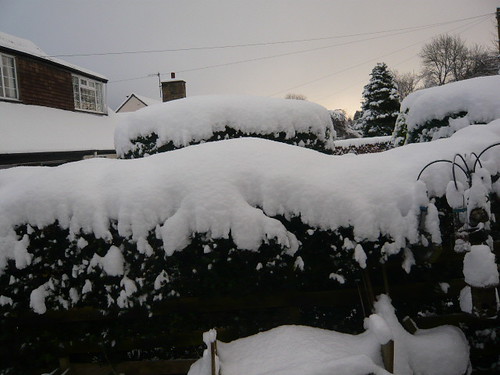
Snow garden

First the bad news! The London Met Office has warned that the winter 2011/12 will be similar to our last three winters with cold and snow caused by high pressure trapped around our Islands.
Now the good news! These long range forecasts are usually rubbish and the opposite may be true.

Even better news for your garden is if you prepare in advance and now is your big opportunity to plan and execute.

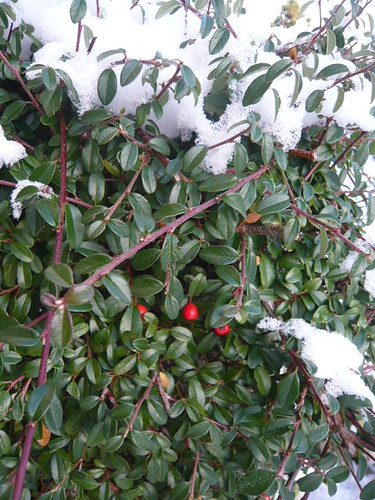
Hedgerow berries

Gardeners Tips Preparing for Winter

  • Leave the berries on your shrubs to provide food and energy for birds.
  • Do not be excessively tidy, piles of leaves and twigs make safe havens for overwintering wild life.
  • Stake susceptible trees and check ties to avoid wind damage.
  • Bring all none frost proof containers into shelter. Wrap tender subjects in hessian.
  • Take cuttings of plants you want to try overwinter just in case. Keep them in frost free conditions.
  • Do not worry snow is a good insulator but the weight can bend even strong branches so be prepared to knock it off before it piles up.

Smile you are on Candid camera

Keep Smiling Plan for Spring Round the Corner

  • Buy and plant bulbs to cheer yourself up during warm spells.
  • Winter pansies, wallflowers, primulas and other plants planted now can get spring off to a colourful start.
  • Get construction and heavy maintenance jobs out of the way so you can concentrate on plants and gardening when the weather improves.
  • Dig your vegetable patch and leave large clods of earth to be broken down by the frost.
  • Sit back, buy your seeds from the many catalogues or mail order and dream of warm spring and summer next year.
Seed Sowing March

Seed Sowing March

107

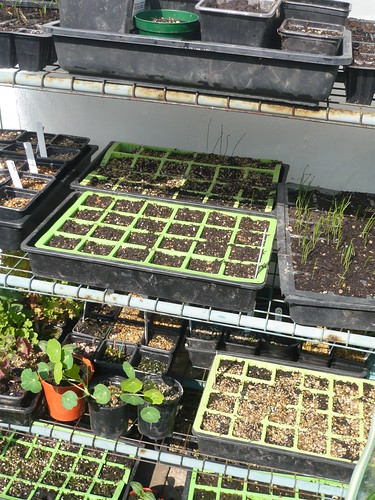
A great time to be getting your first crop of seeds sown.

The RHS seeds I ordered were late arriving but landed last week so I have 21 packets to sow this morning.

Covering Seeds

  • There is no need to cover very fine seeds or seeds that need light to germinate. This includes Begonia, Alliums, and Roscoea for example.
  • Covered with a layer of vermiculite most seeds will germinate in 30 days. If covering with compost reduce the depth of cover to little more than the size of the seed.
  • Slower germinating seeds should be covered with grit instead of vermiculite.
  • Place a glass or plastic propagating cover over the top to retain humidity and provide early protection. Ventilate as soon as seeds germinate.

Special Seed Treatments

  • Cold moist stratification involves giving seeds a period of frost or cold to break dormancy. These seeds may take over a year to germinate so do not give up hope. Try 12 weeks in the fridge if there is room.
  • Chipping (nicked with a knife or sandpaper) or softening seed coats may be needed for hard covered seeds like Lupins and Sweetpeas. This is to allow water to enter and start the germination proocess.
  • Warm stratification may be necessary to mature an embryo. Put the seeds in damp compost in an airing cupboard for a couple of weeks prior to sowing.

General Seed Sowing Tips

  • Use commonsense and read the seed packet. Follow the instructions where practical rather than slavishly.
  • Seeds are pre-programmed to grow to maintain the survival of the species – just give them half a chance.
  • Some seedlings resent root disturbance so sow where you want them to grow or in individual pots of a suitable size for the ultimate plant.
  • Do not be too greedy by planting too close, better 5 good plants than 20 poor weedy specimens.
  • Match the growing medium to the size of the seeds. Sow fine seeds in fine compost and bigger seeds in rougher compost
  • Beware of damping off – seedlings dying due to fungus before they grow leaves.


Read Seed Storage tips and When to sow seeds


Rose Pruning Tips for Healthy Roses

Rose Pruning Tips for Healthy Roses

Peace Rose

It pays to understand the Rose you are going to prune. Shrub roses flower on the previous years wood. Hybrid Tea and Floribunda flower on new wood.

Shrub Roses  (Light pruning)

  • Some flower only once per season, others are repeat flowering.
  • Both types can be congested and prone to disease if not thinned yearly.
  • Non-repeat flowerers are best pruned lightly after flowering.
  • Repeat flowerers can be pruned when dormant taking out slightly more wood.
  • Prune to allow air and light into the shrub.
  • Encourage new growth from the base cut back an occasional old stems to ground level.
  • Light, tip pruning of side shoots helps keep a compact habit

Hybrid Tea Roses  (Hard pruning)

  • HT’s are vigorous plants usually producing a single bloom at the end of each shoot.
  • To encourage new wood on which they flower, ‘harder the pruning the better the flowering’.
  • Shorten stems to about 8″ from the ground
  • Remove all weak shoots entirely.
  • In warm areas cutting back can be slightly less severe 10-12″

Floribunda Roses (Medium Pruning)

  • Floribundas produce flowers in clusters at the end of shoots.
  • A treatment between that for shrubs and HTs works best.
  • Aim to cut to an outfacing bud 2-3″ above last years cut. Once a stem has 3or4 steps in it then cut into old wood.
  • Shorten main stems to 12″ from the ground. Remove weak stems.

Generic Rose Pruning Tips

  • The best time to prune is as roses start into growth. From mid February in the UK.
  • Aim to keep the centre open.
  • Cut out dead and diseased wood then destroy.
  • Cut out crossing or rubbing branches.
  • Newly planted bare rooted shrubs can be pruned to an outfacing bud 3″ high. This helps start a good framework for future years.
  • Deadhead after flowering cutting back to where fresh growth is maturing.

For Climbing and Rambling rose pruning read

Growing Indoor Climbing Plants

Growing Indoor Climbing Plants

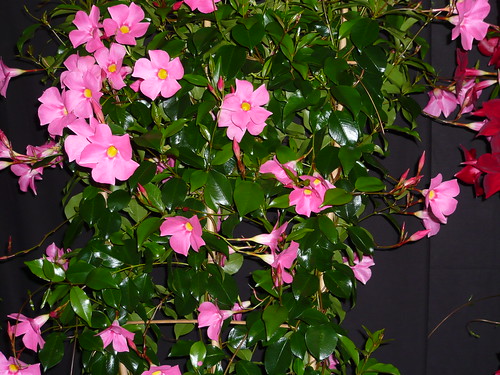
Mandevilla Brazilian Jasmine

Most conservatories have large glass areas and side walls that can be ideal for climbers. Clothing the sides with climbers helps raise the humidity levels and provide shade.

Frost Free Conservatory Plants

  • Passion flowers like Passiflora Amethyist or Passiflora Constance Elliott are nearly hardy even outside.
  • Lapegeria rosea has pink-red bell-shaped blooms from autumn through winter. Use ericaceus compost and train it up a trellis.
  • Annual colour can be provided by morning glories Ipomea lobata.
  • Also an annual Thunbergia Black-eyed Susan are worth considering
  • Evergreen climbers including Ficus and ivies, Rhoicissus rhomboidea Grape ivy, Philodendron scandens Sweetheart vine and Scindapsus aureus Devil’s ivy.

Warmer areas 7º C Plus

  • Bougainvilliea with thrive if given enough space. They grow up to 10′ in a season so beware.
  • Mandevilla Brazilian Jasmine like the one above and Lophopermum are other choices.
  • In smaller conservatories Jamine, Plumbago and Rhodochiton can be kept under control with a bit of trimming.
  • Hoya is a tropical climbing plant with thick leaves and fragrant, waxy flowers.

Supporting Climbers

  • Fix a series of horizontal wires to walls to give the climbers support.
  • On the glass sides fix wires to wooden supports.
  • Alternatively push long canes or trellis into containers for support.
  • Tie twinning stems and tendrils to the supports.
  • Non-clinging plants need more regular tying.
Growing Late Flowering Gaura Lindheimeri

Growing Late Flowering Gaura Lindheimeri

Gaura

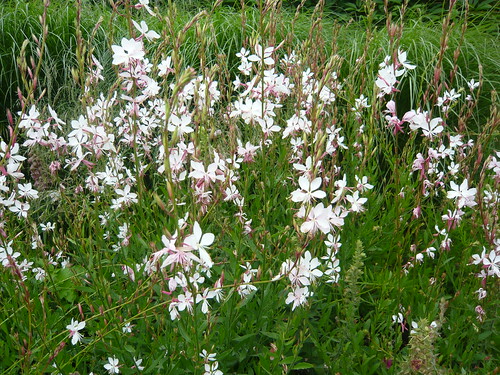
Gaura Lindheimeri is a short lived perennial herbaceous plant growing to 18″-36″ tall from an underground rhizome. Gaura can be treated as a half hardy annual grown from seed and planted out  in mid summer. The plant has an AGM.

Growing Gaura Lindheimeri

  • Gaura is a plant from the prairie and likes a dry sun baked soil.
  • Gaura need space but looks light and airy when flowering after August.
  • The pinky-white flowers clustering on thin hairy stems.
  • Flowers go on appearing for months and  do not need dead-heading.
  • Try the slightly smaller deep-pink form, ‘Siskiyou Pink’ which has stems that are crimson or Cherry Brandy, The Bride Summer Breeze or other named varieties.
  • ‘Corrie’s Gold’ is another Gaura with a gold leaf and white flower.
  • Young plants need to be regularly pinched out to make bushy plants.
  • Mature Gauras do not move well.
  • Gaura Whirling Butterflies has slender stems and leaves are grey-green with ocassional black spots. The multitude of flowers dance above the plant like a host of butterflies when the breeze catches them.

Growing Aconitum

Growing Aconitum

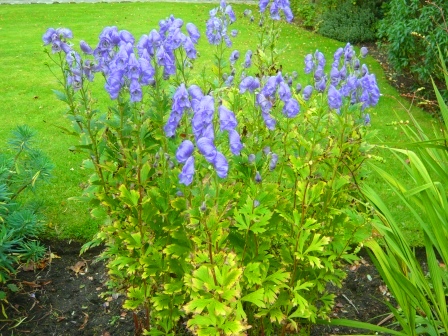
Aconitum is a good autumn flowering border perennial. They do not normally need staking and this variety grows to around 3′ tall. Strong blue or purple flowers predominate in the species but there are some yellow varieties pictured.

Growing Aconitum

  • Aconitum like deep fertile soil and will grow in deep shade.
  • Mulch the crowns in spring with good compost to help retain moisture
  • Cut back stems in late autumn after flowering to prevent wind rock
  • Divide large clumps in early spring as the plants start into growth. Use 2 forks bach to back to pull the plant into sections
  • Beware the plant is poisonous so wash your hands after touching any part of the plant
  • Hide lower foliage by planting at the back and growing lower plants in front

Other Aconitums

  • There are about 250 species of Aconitum
  • They are also known as aconite or monkshood.
  • As Banes they are also called wolfsbane, leopard’s bane, women’s bane.
  • Devil’s helmet or Aconitum is a genus of flowering plant belonging to the buttercup family.
  • Sparks Variety and Stainless Steel are a couple to look out for. However I am seeking  Aconitum x Cammarum a bicolour cross.
  • Try Cottage Garden plants for a selection of hybrids
Growing and Harvesting Curly Kale

Growing and Harvesting Curly Kale

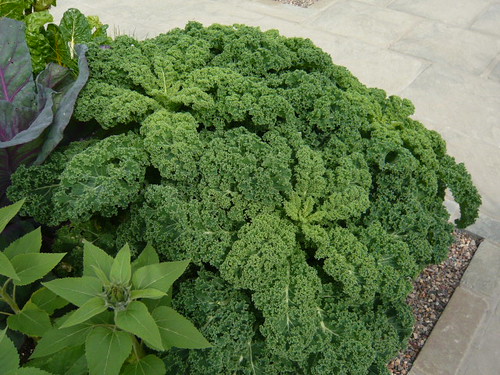
Kale or borecole has returned to popularity as a vegetable. Kale is a form of cabbage Brassica oleracea Acephala and has green or purple leaves.

Growing Curly Kale

  • The leaves do not form a cabbage head but remain open.
  • Some varieties have flat leaves but the flavour and texture is not as refined. These leaves are often used as animal feed.
  • Baby leaves can be used in a salad and have a peppery taste.
  • Black Tuscany Kale has attractive dark green, deeply savoyed, strap-like leaves.
  • The traditional winter hardiness makes this a useful winter to spring vegetable at a time when fresh garden produce is scarce.
  • F1 Kale Reflex has more intensely curled, succulent and nutritious, dark green leaves which stand well without yellowing.
  • Grow Kale from seeds planted in February or March. Some varieties supplied by Thompson Morgan can be grown inside for salads.

Eat the Seasons says ‘Kale is a very handy ingredient for seasonal eaters as it is one of the few green vegetables that is more abundant and flavourful during the coldest months of the year.’

Harvesting Kale

  • Choose a good variety and pick the greenstuff when it is young and tender .
  • Pick from the crown of the plant from November onwards.
  • Remove a few young leaves each time you pick.
  • Use a sharp knife or a sharp downwards tug.
  • Do not gather mature or yellowing leaves for kitchen use as they will be bitter.
  • Stripping of the crown will stimulate the development of succulent side shoots.

For more information on Ornamental Kale read

Growing and Maintaining Raspberries for Big Crops

Growing and Maintaining Raspberries for Big Crops

The summer Raspberries are now finished and I am eagerly awaiting a crop from my Autumn Raspberries planted 2 season ago.
In the meantime the old Raspberries are getting a bit of friendly treatment.

Cultivation of Early Raspberries.

  • The plants throw up canes 3-5 feet high from a stool at ground level.
  • In Summer and Autumn new canes are produced that will carry the flowers and fruit next spring.
  • Canes will only fruit once so old canes should be cut down at ground level after you have harvested the fruit
  • I shred the old canes on to my compost heap.
  • New canes need support. I string wire across the row from stout posts at each end.
  • Raspberries are a hungry and thirsty fruit.
  • Feed with general purpose granular fertiliser like Growmore in spring and mulch with well-rotted farmyard manure.

Varieties and Species

  • Grow Raspberries from bare-root plants in the autumn. You can buy several red raspberry varieties mail order from Thompson & Morgan
  • Glen Moy – spine free canes, heavy crops in early summer
  • Glen Prosen – firm fruit in mid-summer
  • Autumn fruiting types include All Gold and Autumn Bliss

Tips for Growing Raspberries for Big Crops

Plant raspberries in rows and trained along a post and wire system to make a hedge of canes.
Avoid a very windy site unless you can put up windbreaks to protect side branches and pollinating insects.
Canes get replaced each year, roots go on for a long time if maintained with water and feed.
Main-crop raspberries fruit on 1-year-old canes that are then cut down to ground level. Then tie in new growth to the support wires and mulch well.

See also
Coloured and species Raspberries
Growing and maintaining raspberries
Raspberries Spring Summer and Autumn