Browsed by
Category: Tips Hints and Ideas

Help for the new and not so new gardener

Canes for Support in Gardens

Canes for Support in Gardens

‘Oh the old bamboo the old bamboo never-ever bother with the old bamboo’ That song reminds me to weed out the poor and damaged canes I have left over from previous seasons. Away with split canes that snag and frustrate and may carry disease.

In Praise of Canes

  • A good long one will do better than a good short one – well not always as excess length waves around and looks untidy. Fortunately you can shorten canes with secateurs and the off cuts can be used for shorter plants.
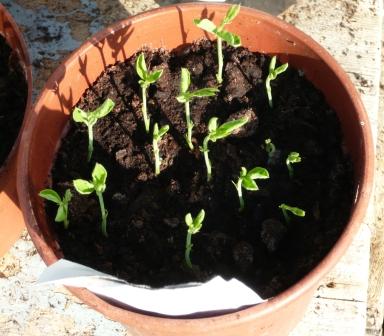
  • Why should Sweetpeas be forced to spend energy on climbing when I can help them with a good cane arrangement.
  • Why should runner beans get top heavy and risk being blown sideways.
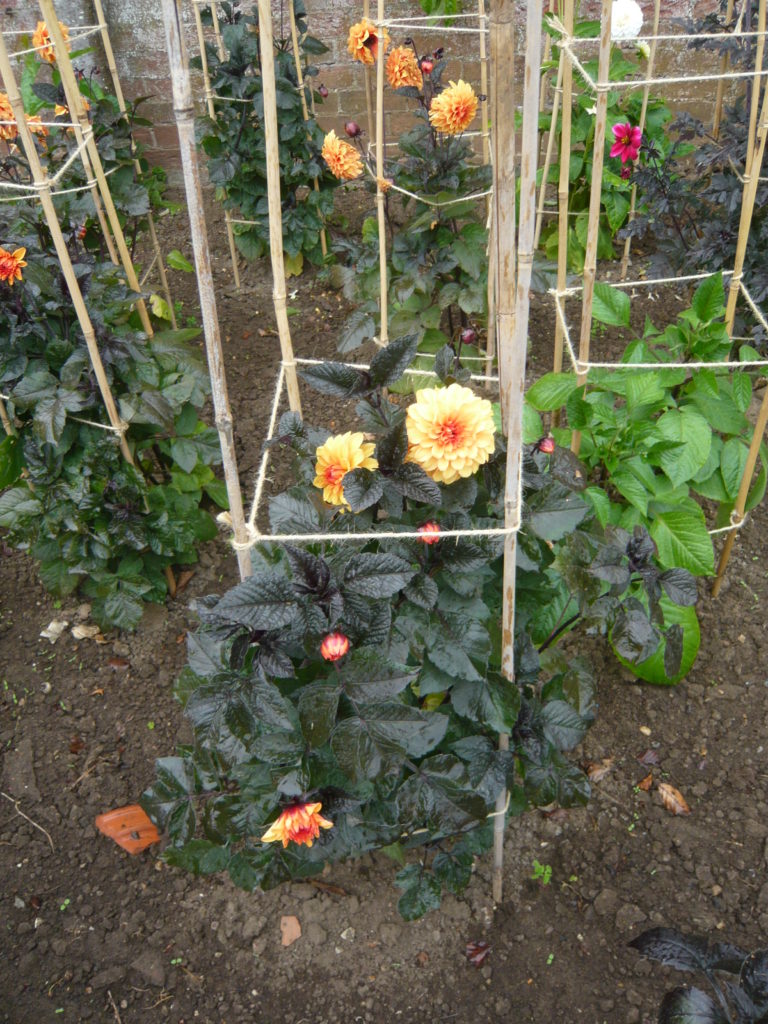
  • Good gladioli and chrysanthemums will be better for a bit of practical and moral support
  • Temporary solutions to problems can often be solved by judicious use of canes.
  • Now my plants are able to perform with the aid of my new canes, string and net supports.
  • I like the idea of mixing bamboo canes with more twiggy stems. I also like the idea of putting two canes across the middle of twin rows of canes for extra support and rigidity
  • This year I resolve to support my plants better than ever before.

None Bamboo Canes

  •  A Large Hazel has already provided a crop of stems to use as further supports. They can be woven in with other supports and look more natural than bamboo.
  • Willow and hazel can be cross hatched to provide a frame work for shrubby plants to grow through.
  • Pea sticks are often short slivers of bamboo painted a dark green. Useful for around 12″ of support.
  • Nylon and other plastic ‘canes’ are obviously not canes but are long lasting and can do a similar job.
  • New tree and shrub supports are more likely to be stakes and ‘gardeners should be choosers’ when it comes to the right strength of item for the job.


To my surprise Amazon now supply or arrange to supply canes in volume via the web – it makes transporting the 7-8 foot ones in my car a thing of the past.


Vermiculite for Gardeners

Vermiculite for Gardeners

Seed Tray Review and Tips

Seed Tray Review and Tips

Plastic seed trays

The clue is in the name Seed Tray – this note is about seeds in trays and although they can double up for seedlings  the issues are different. Seed sowing probably starts in February and is reaching its height by the middle of April.

Seed Tray Review

  • Old wooden seed trays with slats and high sides are still in use. They need care when cleaning before new crops are sown.
  • Plastic seed trays from rigid polypropylene with drainage holes can be used time and again and are easy to store and clean. There is generally a pattern of ridges to improve drainage.
  • I like to use the thin plastic segmented inserts like those in the photograph inside a normal seed tray .
    • It adds rigidity and makes for easy movement
    • They are cheap enough to be disposable but last a couple of seasons with care.
    • They vary in the number of cells, 3×5, 8×5 or 4×6 for example.
    • Each cell can be for individual seeds or used for several fine seeds. It makes pricking out and planting far easier.
    • The cells can also be used for growing on after pricking out. 15 or 24 good plants can be raised in one tray.
    • Do not put plastic inserts in a tray without drainage holes or the compost may get water logged.
  • Seed trays can be used to hold individual pots in one place. Up to 15 square 3″ pots can be put in one tray and they are a bit deeper than a standard tray.
  • Disposable or disinfectable, plastic  labour saving devices were not available to our parents and grandparents but take care how you dispose of them.

Alternative Seed Trays

  • If you can find them old fish boxes can make good seed trays. The polystyrene variety helps to keep an even temperature. Some old fruit boxes can be adapted as seed trays. In both instances make sure there is adequate drainage.
  • You do not need a tray per se,  any container with drainage holes will suffice. I use a lot of old plant pots for starter seedlings.
  • Rubberised plastic trays usually in black are more rigid and I find them better than the extruded green plastic shown above.
  • Home made compressed capsules, rolls of paper, even cardboard toilet paper tube can be pressed into service.

Seed Tray Tips

  • Take care when watering to get all the area damp. Some composts and soils are difficult to get evenly wet
  • Label your seed sowing with the date and type of seed sown.
  • Sterilise your used seed trays in Jeys fluid or similar.
  • To water from the bottom fill a larger container and stand the tray in the water until enough has been taken up by capillary action.
  • Do not leave seedlings too long before pricking out. Long roots soon become stunted. Seedlings need space to develop roots.
  • Carefully push out the cell contents from the bottom if using a plastic product. Otherwise a firm tap will generally loosed to compost.
  • Be careful  small cells hold less soil and moisture.
  • The edges and cells near to the drying sun can be hostile to seedlings.
  • Exposure to sun and the elements can make some plastic brittle.
  • Prick out and pot on as soon as possible (when two leaves are showing).

Special Seed Sowing Devices

  • Matching the seed tray to the plant you are growing may dictate the tray you use.
  • Sweetpeas need a long root run and trays tend to be too shallow. I use deep pots but you can sow in root trainers or home made paper tubes.
  • Biodegradable peat pots can be used for plants that do not like their roots to be disturbed.
  • Individual pots may be best for large or expensive seed.
Secateurs and Why I Choose Them

Secateurs and Why I Choose Them

Secateurs are an indispensable tool for the the tidy minded gardener and even me.

 Ergonomic  Features to Look For on Secateurs

  • I like to be able to find the secateurs when I inevitably put them down despite the intentions of keeping them about my person. I good bright colour for the handles helps. I have lime green and red on my two favourite pairs and surprisingly the lime green stands out even amongst leaves and foliage.
  • On a similar ‘ability to find theme’ I like the pair with a small loop at the end of one handle with a hole drilled in. This allows a string or wire to be fed through to facilitate hanging them in a suitable location.
  • The grips should be moulded for fingers so a good purchase and transfer of power can be distributed. On my right handed secateurs the blade section has 4 finger grooves and the other handle is curved for the thumb and palm without a groove.
  • The grips are often some form of rubberised or hard plastic which I find preferable to bare metal that strikes cold.
  • Most secateurs have a thumb operated locking facility to keep them closed and safe when not in use. The idea is sound but you need to be able to operate this with the thumb of the same hand. A fiddly or unsafe device can be very frustrating.

Selected Secateurs

 Functional Features to Look For on Secateurs

  • There are two basic options for the blades to bypass one another in a scissor type motion or for the blade to cut then hit an anvil like a chopping board. I like the bypass or parrot nosed version for the majority of soft wood and stem cutting. I find that leaves the plant wound less prone to damage. The anvil approach is good for twigs and dryer material.
  • The blade and access to keep it sharp are key features. When buying new secateurs look for the best you can afford but focus on the blade.
  • At the base of the blade at the junction of the other arm there is normally a notch that can be used to cut tough items like wire.
  • The return (compression) spring to open the secateurs after every cut is generally held in place by two holes or protuberances near the top of each handle. They are key to the functionality and fun of using your secateurs  and if they spring loose you can spend ages looking for them. Keep them oiled and clean and if necessary stretch them to make a tighter fit.
  • Blade replacements are faffy and I find it hard to locate supplies. Why don’t manufacturers supply spares with new secateurs.
  • A Falco branded pair have a finger side handle that twists a quarter turn as you operate. I like this but am not sure it stops repetitive strain injury as I assume was the intention. I wont know unless I buy a new pair as this feature disabled itself and no longer works.
  • I have not used ratchet or geared secateurs that cut in a number of stages but find that useful on my loppers.


Well used anvil secateurs

My Experience Using Secateurs

  • There is a tendency to want to twist when cutting tough stems. This sprains the scissor action out of alignment and can cause irreparable damage. I have done this with many cheap pairs before I knew better.
  • As you can see I have numerous pairs that are not all that clean. I do oil them and try to remember to wipe excess sap off the blades.
  • I have a sharpening stone that I use frequently. I once sharpened the inner bit of the blade and then you could see light through where  gap should be. Sharpen the external edge.
  • For  cutting thicker stems use a lopper or more robust shears.
  • I have a good pair that occasionally nip the skin as I close them. As well as painful and frustrating I am also put out by having forgotten the makers name!

Gardeners secateurs tips


Edible Hedges You Can Grow & Pick

Edible Hedges You Can Grow & Pick

Sloes and damsons are in good supply this September in your local hedgerows. I have relied on my own blackberries this year but from the train window yesterday there were masses of plump black fruit for picking.

Forage amongst the book shelves to get a cornucopia of edible wild plant ideas.

Book Cover
You can plant your own edible hedge now until late March which will give you a supply of edible fruit and berries for years to come. Bare rooted plants are very reasonably priced.

Easy Step by Step Hedge

Clear the ground to remove weeds and old roots by digging or using Glyphosphate based weedkiller. Leave for a few weeks.
Pick a frost free day and when ready to plant put bundles of bare rooted plants into a bucket of water to give them a drink.
Mark out the line of the hedgerow bearing in mind you will want two staggered rows of plants. You can put down mulch matting and plant through it if you wish.
You will need 4-5 plants per square yard.

Read More Read More

Hosta Little Tips

Hosta Little Tips

otley show hostas 035

I am no great fan of large leaved hostas probably due to lack of space in my garden where I prefer to grow other plants. However the dwarf varieties are easy to get on with.

An alternative name for Hostas is Funkia. That appeals to me and helps describe how the plants can create congenital abnormalities and abnormal formations. (Teratology).

Small Hosta Tips

  • There are a host of varieties to start to growing and collecting may become an obsession. There are 49 named varieties of ‘mouse-ear’ varieties alone.
  • Water well in spring even before the first leaves show. Roots need water particularly as the light increases.
  • The better the roots the better the plants will display.
  • In spring restart the plants with slug bait, slow release fertiliser and a mulch.
  • A weak solution of Tomorite makes a good foliar feed.
  • Epsom salts will provide needed magnesium when the leaves have hardened in early summer.
  • Water  lightly  in autumn to fatten up the roots for winter.
  • Allow plants to make good clumps. Leave for 3 years or so before dividing. I tend to be too impatient dividing to get more plants.
  • Encourage flowers and collect seed to increase your stock.
  • The more light a hosta gets the more water it needs.

otley show hostas 050

Tree Stump Removal

Tree Stump Removal

Are you stumped about how best to remove the stump and roots of  a tree after you have taken down the trunk and branches? This is the stump of an over grown Eucalyptus that was removed in spring. The slit was intended to hold weed killer but as the side shoots show it hasn’t worked. (Thank you EU for no help at all see below.) The scale of the stump and thus the size of my digging out problem is shown by my spectacles. I guess I should have known Eucalyptus are successful at regenerating.

Reasons to Remove Old Stumps

  • Stumps left in the ground after felling can cause replanting issues. Roots may get in the way, nutrients may be missing and the stump may look unsightly.
  • When simply felled the old tree can produce new shoots and suckers.
  • Roots can play host to various fungus and disease’
  • Roots may continue to cause uneven surface problems.

Removal Methods

  • Grubbing out by hand, spade and mini digger are the first port of call.
  • Winching out using the old trunk as a lever can be done with the right machinery and is often seen in operation on forestry land.
  • The root can be ground out and turned into coarse saw dust with a grinder or chipper often owned by a tree surgeon.
  • Applying brushwood or weed killer containing commercial strength  glyphosate or ammonium sulphamate. Drill holes in the stump around the circumference and fill with the weedkiller. Roots should die within a couple of months but the stum will take years to rot away depending on the species.
  • Root Out was a popular,  RHS recommended, product that encourage rotting. Crazily it has had its approval for use as a  herbicide, weed, tree and bramble killer withdrawn by EU and  it is now only sold as a Compost Accelerator. It was used, amongst other purposes to help prevent the spread of Honey Fungus Armilleria
  • Nature will eventually rot down your stump slightly quicker if you cover it in garden compost so the micro organisms can get to work. In the meantime it can be ‘tarted up’ for other purposes such as part of a stumpery or support for a decorative pot.
Sowing Vegetable Seed in Summer

Sowing Vegetable Seed in Summer

Late Sown Peas

Reasons for Summer Seed Sowing

  • If you want a regular supply of salad crops and continuity of fresh vegetables then sow through summer.
  • Some crop failures can be retrieved by a summer sowing.
  • Some crops prefer a late sowing. Runner beans soon catch up if sown now.
  • Summer sowing lengthens the harvesting period and late sowings come into their own as early sowing begin to peak.

Tips for Summer Sowing

  • Salad, carrots , radish and cut and come again crops are suited to direct sowing.
  • Increase the organic matter in your soil during autumn to increase the water retention ability.
  • Water your weed free seed bed a couple of days before sowing to increase the moisture level to a depth of at least 2″.
  • In very dry conditions water a deep drill before sowing and leave a U shape furrow to focus more water to the seedlings
  • A fine tilth and firming down will help the seed make good contact with the moist soil.
  • If the soil is prone to forming a crust cover seeds with proprietary compost rather than garden soil.
  • Covering new seed drills with fleece or newspaper reduces evaporation as would any temporary shading.
  • A tip for lettuce germination is to sow in the afternoon – lettuce need a cool period to germinate.

Look after your summer sown children – Do not go on holiday – ‘do not collect £200 for passing go.’

Summer Pond Care

Summer Pond Care

Summer is another tough season for small garden ponds. The warmer weather can spoil the balance between the amount of vegetation and the levels of sunlight.

Pond Weed

Observations and Summer Tasks

  • Aquatic plants help maintain a balanced pool free from algea in summer.
  • Free floating plants reduce the amount of sun reaching the depths and keep the water cooler. Gently place new plants on the surface.
  • Maintain 50% of the water surface clear of vegetation thinning when necessary.
  • Deep water aquatic plants with floating leaves like water lilies benefit from regular dividing.
  • Submerged oxygenating plants are vital to pool hygiene 5-20 stems per square yard of surface is needed.
  • Excessive plant growth replaces oxygen with carbon dioxide at night potentially causing fish to die.
  • Thin out and avoid invasive species such as Mtriophllum acquaticum.
  • Good housekeeping involves topping up water levels and removing dead and rotting vegetation.

Thorpe Perrow Lake

Summer Pruning Lavender

Summer Pruning Lavender

bee lavender

Lavender will not sprout willingly from old wood. So when pruning make certain some green wood remains. Lavenders bloom on the stems that grew that year. Pruning is designed to encourage more flowering branches and give plants a longer life.

  Lavender Pruning Tips

  • Lavender angustifoila (English Lavender) should be pruned every year.
  • Keep the plants tight, shapely and compact
  • Remove flower stalks after flowering
  • Prune an an inch or so of this years growth and a third of the older bushes without cutting into older leafless wood.
  • Late summer is an ideal time to prune English Lavender.
  • Less hardy varieties Lavender stoechas (Spanish Lavender,  French Lavender) and intermedia Lavendin should be trimmed immediately after flowering and if necessary again in autumn.
  • Start gentle pruning when the plants are young and be heavier on older plants.
  • Pruning in spring can delay flowering.

Lavender can make a neat informal hedge but follow a good pruning regime. Trim twice a year to maintain shape and general performance.